
Appearance
Projector Control (PJ-Link)
Exaplay 3 can power projectors and open/close their shutters directly over the network using PJ-Link, the vendor-neutral projector control protocol. Devices are managed in the Control View → 📺 Devices tab and can be exposed to end users through the User Panel Builder.
3.2 adds multi-device management: bulk range-add and live power-status polling. 3.3 adds the on-demand Refresh Status button below.
Adding Projectors
Open the Control View (http://<engine-ip>:8123/control) and go to the 📺 Devices tab. Under PJLink Projectors you have two ways to add devices.
Add a single projector
Click Add PJLink Projector and fill in:
| Field | Description | Default |
|---|---|---|
| Name | Label shown on the device card and in user panels | — |
| IP address | The projector's network address | — |
| Port | PJ-Link control port | 4352 |
| Password | PJ-Link authentication password (leave empty if disabled) | (empty) |
Add a range of projectors
For a wall of identical projectors on sequential IP addresses, click Add Range to create many at once:
| Field | Description |
|---|---|
| Base name | Name prefix; each device is numbered (e.g. Projector 1, Projector 2, …) |
| Base IP | Starting IP address — the last octet is incremented per device |
| Start number | First index used in the generated names |
| Count | How many projectors to create |
| Port | PJ-Link control port (default 4352) |
| Password | Shared PJ-Link password applied to every device in the range |
Live Power Status
Each projector card shows a live power-status badge that Exaplay keeps current with low-frequency polling, so you can see at a glance whether a projector is on, off, warming up, or cooling down without leaving the Control View.
Next to All Projectors On / All Projectors Off, a Refresh Status button queries every configured projector on demand instead of waiting for the next automatic poll — useful right before a show to confirm every projector's actual state. The button shows a spinner and reads "Refreshing…" while the poll is in flight.
Controls
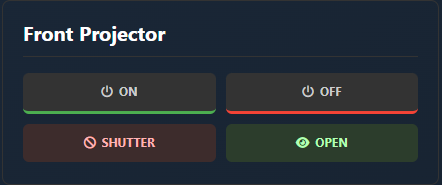
Each device card provides:
| Control | PJ-Link command | Action |
|---|---|---|
| Power On | POWR 1 | Turn the projector on |
| Power Off | POWR 0 | Turn the projector off |
| Shutter / AV mute on | AVMT 11 | Close the shutter (blank the image) |
| Shutter / AV mute off | AVMT 30 | Open the shutter / clear all mutes |
| Edit | — | Change the device's name, IP, port, or password |
| Remove | — | Delete the device |
At the top of the section, All Projectors On and All Projectors Off send a power command to every configured projector at once — handy for show start and end.
Devices are saved to the project (.vpp) and to the browser's local storage, so they travel with the project.
Exposing Projectors to End Users
PJ-Link devices can be added to a User Panel so non-operators get simple power and shutter buttons without the full Control View. See User Panel Builder → Adding TCP / PJLink Devices.
Password-protected projectors
PJ-Link authentication is handled for you: when a projector announces that it wants a password, Exaplay answers with the digest the protocol requires (MD5 over the projector's own one-time challenge plus your password) in the same packet as the command. Enter the password in the device's Password field and nothing else is needed — it is stored with the device, travels with the project, and is sent on every command, including scheduled actions and the background power-status poll.
Leave the field empty for a projector that has no password set. A password typed in for a projector that does not ask for one is simply not used; the projector decides.
Two failures are reported separately, because the remedy differs:
| Message | What it means |
|---|---|
| The projector rejected the PJLink password (ERRA) | The password reached the projector and was wrong. Some projectors also lock out for a while after repeated failures — power-cycle the projector if a corrected password keeps being rejected. |
| This projector requires a PJLink password, but none is configured for it | The projector asked for a password and the device's Password field is empty. Nothing was sent. |
Before 3.3.9 the password was collected but never actually used, so only projectors with no password set could be controlled. If you are on an older build, that is the cause.