
Appearance
Audio
Exaplay 3 plays audio through ASIO or the Windows standard audio device (PortAudio), with per-clip mixing and multi-channel routing on ASIO interfaces.
Audio Drivers
| Interface (as named in Settings) | Use case |
|---|---|
| ASIO | Professional audio interfaces; the lowest latency the device and its buffer size allow, and routing to individual output channels |
| Windows Standard Audio Device | The Windows default playback device through PortAudio (WASAPI where available), any sound card |
Configure the interface in Menu → Settings → Audio (see Audio Settings).
For a Dante network use ASIO with Dante Virtual Soundcard or a Dante interface — see Dante Audio.
Volume Levels
A clip's loudness is the product of every level above it — turning any one of them down turns the clip down:
| Level | Where | Range |
|---|---|---|
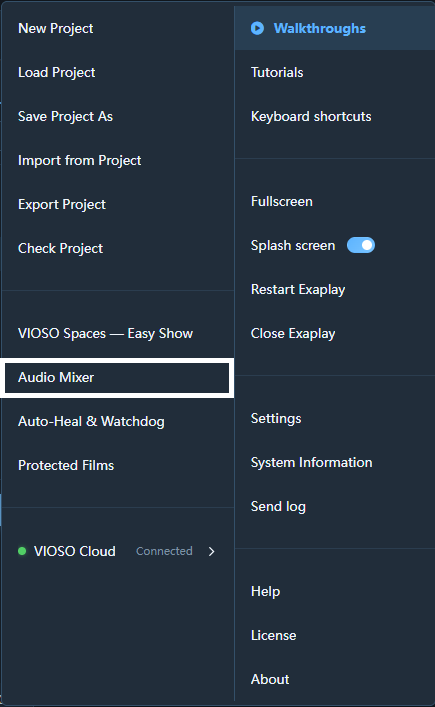
| Master volume | ☰ → Audio Mixer, top row — everything on this machine. The same value as a User Panel's Master Volume and the Volume row in the Network tab's inspector. Per machine, not saved with the show; it starts at 100 % with the engine | 0–100 % |
| Output trim | ☰ → Settings → Audio — a permanent correction of this machine's output, kept across restarts. Leave it at 100 % unless an amplifier needs it | 0–100 % |
| Composition volume | The Composition volume fader in the Transport bar (the composition on the active tab — not a master), or the composition's Audio section in the Inspector | 0–100 % |
| Track / group volume | The Audio section of the track or group in the Inspector | 0–100 % |
| Clip volume | The clip's Volume fader in the Inspector | 0–100 % |
Each level also has its own mute: the Mute switch next to a clip's Volume fader, the switch in the header of a track's, group's or composition's Audio section, and, for all audio at once, the MUTE switch in the header, beside BLANK (it reads MUTED on red while the sound is muted; click it again to unmute). A clip's volume can be animated with volume keyframes. Clips are mixed in software before being sent to the audio driver, and level changes are applied as a smooth ramp rather than a jump, so moving a fader does not click.
Equalizer (EQ)
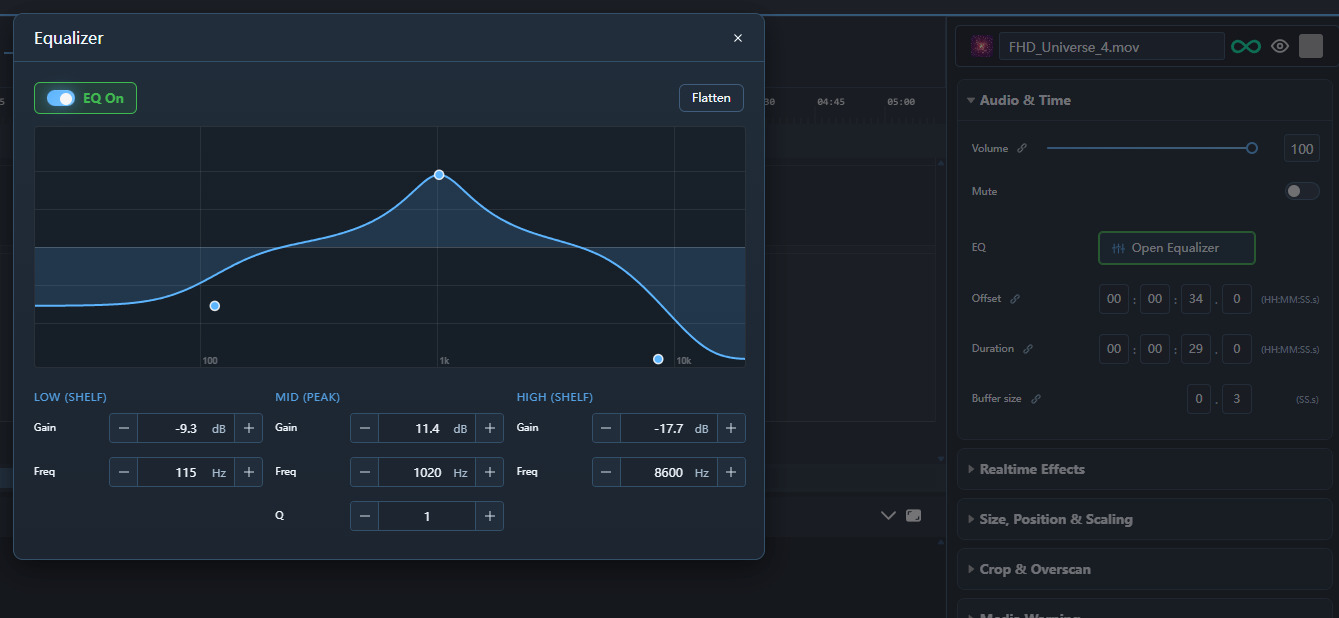
Each clip has its own 3-band EQ. In the Inspector the clip's Audio & Time section has an EQ row with an Open Equalizer button; the button's frame turns green while the EQ is on. The button opens the Equalizer editor in a popup:
- The EQ On / Off switch at the top left.
- A large interactive response curve — drag the Low, Mid, and High nodes directly on the graph to shape the sound.
- Numeric controls per band: Gain (−18 to +18 dB) and Freq for all three bands, plus Q (0.1–10) on the Mid band — Low and High are shelves and have no Q. Frequency ranges: Low 20–1000 Hz (default 120 Hz), Mid 100–10 000 Hz (default 1 kHz), High 1–20 kHz (default 8 kHz).
- Flatten sets all three gains back to 0 dB; frequencies and Q are kept.
The EQ is off until you switch it on, is applied per clip in the audio path, and is saved with the project.
New in 3.2.
Output Channel Routing
On an ASIO interface every clip, track and composition has a First Ch selector in its Inspector (it is not shown with the Windows standard device):
- First Ch is the output channel the clip's first audio channel is sent to; its remaining channels follow on the next channels in order. A stereo clip set to CH03 plays on channels 3 and 4.
- Default means "inherit": a clip on Default uses its track's First Ch, a track on Default uses the composition's, and a composition on Default starts at channel 1.
- The setting is saved in the project file.
Audio Mixer
Menu → Audio Mixer starts with this machine's Master volume (every audio interface; a Muted badge shows while the show's audio is muted). Below it, one strip per ASIO output channel: a level meter, a gain fader (0–100 %) and the channel's name from the driver. The gains are saved with the project and restored when it loads.
The meter shows the channel's sample peak in dBFS (0 dB = full scale) over −60 to 0 dB, with marks at 0, −6, −12, −24 and −48 dB, each at the height its level really draws at. The bar is green below −6 dB, yellow from −6 dB and red from −1 dB (at or near clipping). With the Windows standard device there are no channel strips — the mixer says No ASIO output channels available.
Timecode Audio (LTC)
Linear Timecode (LTC) can be received on an audio input and used to synchronise playback. See Timecode Sync for setup details.