
Appearance
File Browser
The File Browser (media browser) lives at the bottom of the Main Editor, below the active Timeline or Playlist. This keeps the right sidebar dedicated to the Inspector and gives the composition area the full editor width.
The panel can be resized by dragging its top edge. The two buttons at its top right minimize it (and restore it) and maximize it when you need more room for browsing.
The STAGE tab has the same browser under its canvas, folded until you open it (its fold and height are its own; tab, folder and search are shared with Produce & Play). There, content is dragged onto a screen (or an additional field): a double-click adds nothing, and an effect goes on a clip in Produce & Play. See Content onto a screen. Its Media tab also lists VIOSO calibrations (.vwf): drag one onto a screen to load it there — see Projection Mapping.

Tabs
| Tab | Content |
|---|---|
| Media | Video, image, audio and text files on the Exaplay PC (and the Exaplay Cloud library) |
| In Project | Media files already used in the loaded project, ready to reuse |
| Live Feeds | The Text source, the NDI Receiver, cameras and capture cards, screen capture, web capture, the generic Spout Input plus every running Spout sender |
| Watch | Watchfolders — see Watchfolders |
| Generators | Generative sources you drag onto a track like a video — see Generators |
| Effects | Effects you drag onto a clip — see Visual Effects |
Media Tab
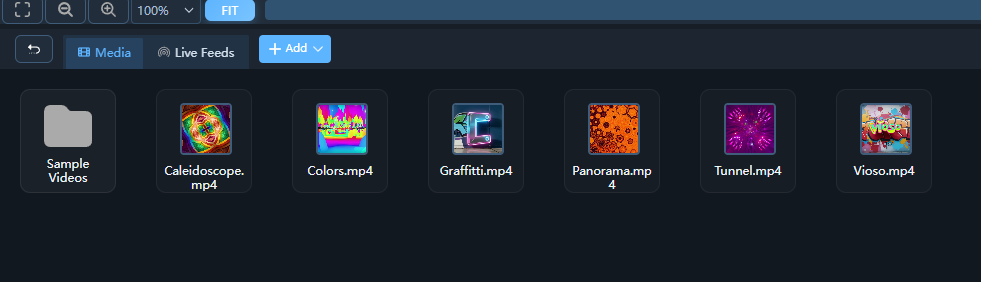
Browsing Files
- The browser starts at Home: folder tiles for Exaplay Cloud, Exaplay3 (your
Documents\Exaplay3folder), Documents, Desktop, Videos, Pictures, Audios, and every drive of the Exaplay PC. - Click a folder to open it. The bar at the bottom shows the current path — click Home or a folder in it to go back up; the back button at the top left goes back one step.
- Hover a file for its format, resolution, codec, frame rate, duration and size.
- The bottom bar also holds Search…, the thumbnail size slider, sorting by Name, Size or Ext, and the view mode (Miller columns, detail or thumbnail view).
Adding Files
With a folder open, + Add offers Upload media… (copy files from the computer you are working on to the Exaplay PC) and New folder…. You can also drop files from your computer onto the browser to upload them into the open folder.
Supported Formats
The Media tab lists these file types:
| Type | File types |
|---|---|
| Video | MP4, MOV, M4V, MKV, WebM, AVI, MPG / MPEG, M2V, WMV, FLV, TS / M2TS, and raw HAP / HAP Q / HAP Alpha, NotchLC, H.264 and H.265 streams |
| Image | PNG, JPEG, GIF, BMP, TIFF, WebP, SVG |
| Audio | WAV, MP3, AAC, M4A, AIFF / AIF, OGG / OGA, FLAC, Opus |
| Protected film | XPC (an encrypted Exaplay film) |
| Text | TXT (for a text layer's Text file) |
Which codecs inside these containers play, and how they are decoded, is described in Media Playback and Video Decoding.
Converting Files
Right-click a file in the Media tab for what Exaplay can make from it. The new file is written next to the original, which stays untouched:
- Encode → HAP, HAP Q or HAP Alpha — see Encoding HAP.
- Export audio as WAV — writes the clip's sound track as a WAV file, for a sound desk or an audio editor. Offered on video files and compressed audio (MP3, AAC, M4A, FLAC, OGG, Opus, AIFF). The WAV is 24-bit at the clip's own sample rate and channel layout; a clip with several sound tracks exports the first. The file is named after the clip (
Intro.mov→Intro.wav); if that name is already taken, Exaplay adds a number (Intro (2).wav) rather than replace your file. A clip without sound is refused with a message.
The panel at the bottom right shows each job's progress and reports when the file is ready. An encrypted film (.xpc) cannot be converted.
Adding Media to the Timeline
Drag a thumbnail from the File Browser and drop it onto any track in the Timeline. The clip is inserted at the drop point. Dropped on empty timeline space, it gets a new track of its own. Dropping a folder creates a new track filled with the folder's image files (other files in it are skipped).
In Project Tab
Lists every media file the loaded project already uses — one card per file, no matter how many clips reference it — so you can reuse existing content by dragging it again instead of navigating back to its folder every time.
- Cards drag onto timelines, playlists and screens exactly like files from the Media tab.
- Each card shows how often the file is used in the project.
- A warning badge marks files that are currently missing on disk.
- Live inputs and generative sources are not listed here; they have their own tabs.
- Show in media pool in a clip's right-click menu (Timeline and Playlist) jumps to the clip's card here and lights it for a moment — the way from a clip to its file's decode badge, the engine's reason and the file's own verbs.
Live Feeds Tab
Shows the live inputs this machine can open: the NDI Receiver (the NDI sender is picked afterwards in the clip's Set Live Parameters — see NDI Support), cameras and capture cards, screen capture, Webcapture, the generic Spout Input plus every running Spout sender, and the Text generator. Drag a live feed to a timeline track the same way as a media file.