
Appearance
Your First Project
In this tutorial you will build a complete show-ready project with two screens, background video loops, a title graphic with a crossfade transition, and a Playlist for operator control. This covers the most common Exaplay 3 workflow and introduces several key features.
Time required: about 20 minutes
What You'll Build
A dual-projector setup for a live event:
- Left projector — Looping background video + title graphic that fades in on cue
- Right projector — Looping background video (continuous)
- Playlist — A named cue that triggers the title graphic, operable by hotkey or mouse click
- Operator URL — A simplified control view for your show operator
By the end, you will understand multi-screen workflows, layers, transitions, Playlists, and the operator control view.
Before You Begin
Make sure you have:
- [x] Completed the Quick Start Tutorial and are comfortable with the basic workflow
- [x] At least two display outputs connected (or one is fine — you can still create multiple screens for pre-programming)
- [x] The following media files ready:
- A background video (any video loop or long clip)
- A title graphic (a PNG or JPEG with transparency works best, but any image will do)
Working with one monitor?
You can follow this entire tutorial with a single monitor. Exaplay 3 lets you create screens without physical outputs — the content renders in the canvas preview. You can assign outputs later when the hardware is available.
Step 1 — Create a New Project
- Launch Exaplay 3 (or if it is already running, choose File → New to start fresh).
- Immediately save with Ctrl+S and name it something meaningful, e.g.
Event Show.
Saving first gives your project a .vpp file on disk. This is a good habit — it enables auto-save and auto-heal recovery.
Step 2 — Create Two Screens
You need a screen for each projector. You created a single screen in the Quick Start — now repeat the process twice:
Screen 1: Left Projector
- Click + Screen in the header bar.
- Set Name to
Left. - Choose the Output for the left projector (or leave it unassigned for now).
- Click Create.
Screen 2: Right Projector
- Click + Screen again.
- Set Name to
Right. - Choose the Output for the right projector.
- Click Create.
You now have two tabs in the header bar — Left and Right. Click each tab to switch between their compositions and timelines.
Screen tabs
Each screen tab shows that screen's composition, timeline, and inspector properties. Think of it like having two independent editing workspaces — one per projector.
Step 3 — Add Background Loops
Next, add a looping background video to both screens.
On the Left screen:
- Click the Left tab in the header to select it.
- In the File Browser, navigate to your background video.
- Drag the video thumbnail onto Track 1 in the Timeline.
- Select the clip on the timeline (click it). The Inspector panel on the right shows the clip's properties.
- In the Inspector, find the Loop setting and set it to ∞ (infinite loop). This makes the video restart automatically when it reaches the end.
On the Right screen:
- Click the Right tab.
- Drag the same (or a different) background video onto Track 1.
- Select the clip and set Loop to ∞ in the Inspector.
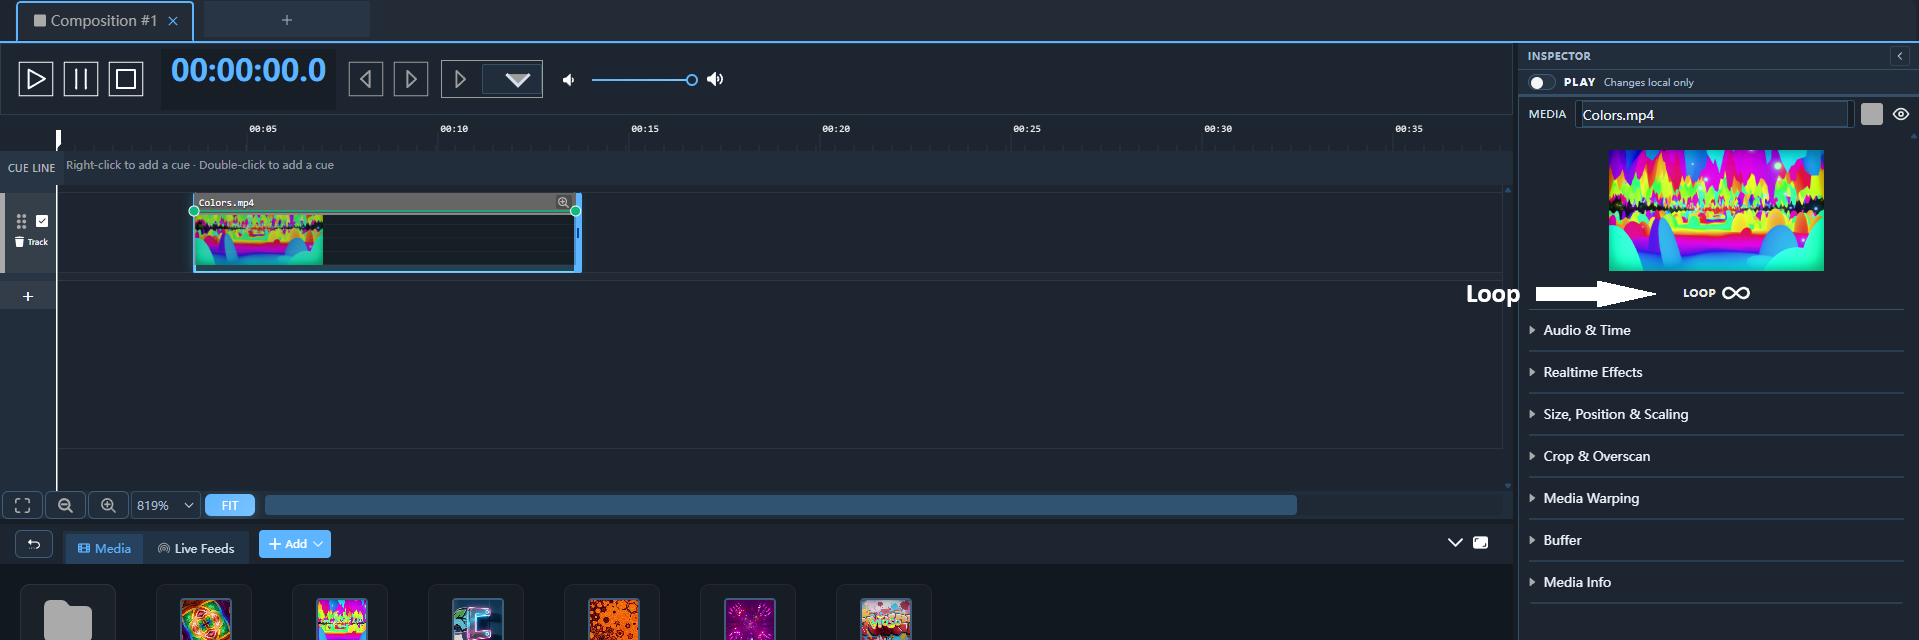
Press Space to play. Both timelines start simultaneously and you should see the background videos looping on the canvas previews.
Why use Track 1 for backgrounds?
Track 1 is the bottom layer of the composition. Content on higher-numbered tracks draws on top. Placing your background on Track 1 ensures it is always behind any foreground graphics or titles you add later.
Step 4 — Add a Title Graphic
Now add a title graphic that will appear on the Left screen on top of the background.
- Click the Left tab to switch to it.
- In the File Browser, navigate to your title image (PNG/JPEG).
- Drag it onto Track 2 in the Timeline.
- Position the clip on the timeline at the timecode where you want the title to appear. You can drag the clip left or right on the track to adjust its position.
- Select the clip and configure it in the Inspector:
| Property | Value | Why |
|---|---|---|
| In Transition | Crossfade | The title will smoothly fade in rather than appearing abruptly |
| In Duration | 1.0 s | The crossfade takes one second |
| Out Transition | Crossfade | It also fades out smoothly |
| Out Duration | 1.0 s | One-second fade out |
Transition types
Exaplay 3 supports several transition types including Cut (instant), Crossfade (smooth opacity blend), and others. Crossfade is the most commonly used for professional shows.
The title graphic now sits on Layer 2 (Track 2), above the background on Layer 1 (Track 1). When the playhead reaches the title clip, it crossfades in over the background. When the clip ends, it crossfades out.
Step 5 — Create a Playlist
So far, everything is driven by the continuous timeline. For a live show, you usually want an operator to trigger events manually. That is what Playlists are for.
Add a Playlist composition
- Click the + button in the composition tab bar to create a new composition.
- In the editor area, click Playlist to set the composition type (instead of Timeline). Rename it (e.g.
My Cues) in the Inspector. - The composition's editor area now shows the Playlist with its empty cue list.
Add a cue
- Click + Cue to create a new cue entry.
- Configure the cue:
| Field | Value | Description |
|---|---|---|
| Name | Title In | A descriptive label for the operator |
| Action | Go to timecode | The cue will jump the timeline to a specific position |
| Timecode | e.g. 00:00:05:00 | Enter the timecode where the title clip begins on Track 2 (match the clip's position on the timeline) |
| Hot Key | F1 | Pressing F1 triggers this cue |
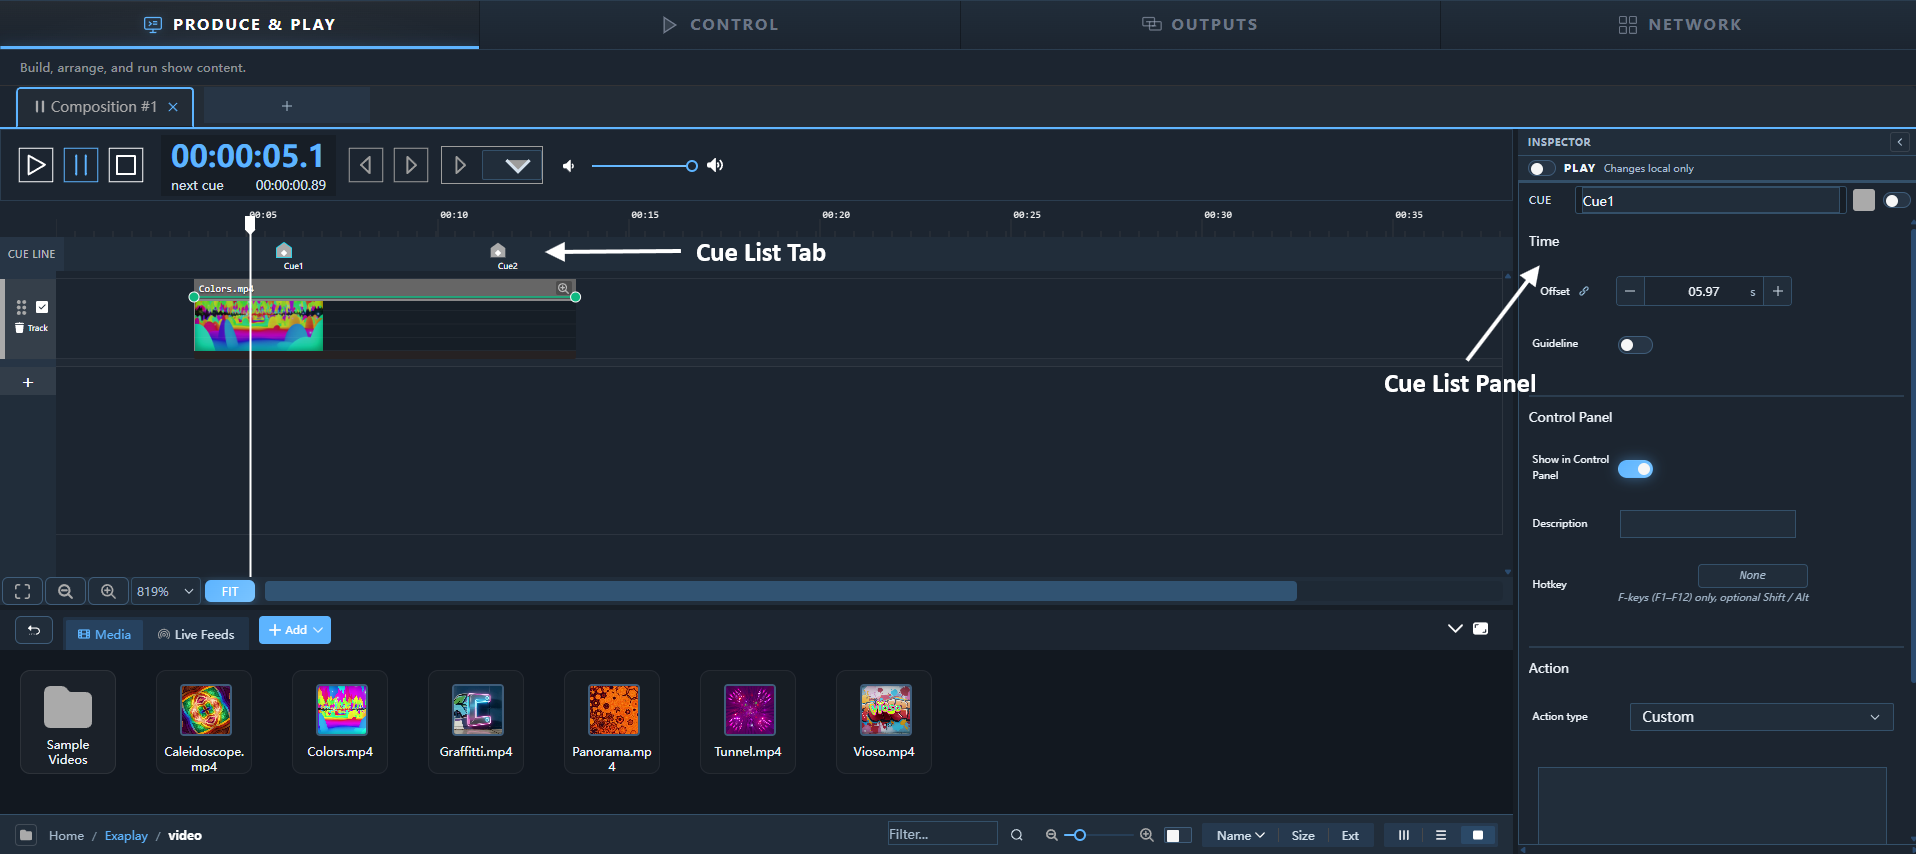
How cues work
When the operator triggers a cue (by clicking it, pressing the hotkey, or receiving an external command), the timeline jumps to the specified timecode and begins playback from there. This means the background video keeps looping on Track 1 while the title graphic crossfades in on Track 2.
Test the cue
- Press Escape to stop playback and return to the beginning.
- Press Space to start playing the background loop.
- Press F1 — the timeline jumps to the cue timecode and the title crossfades in.
If it works, you have a functional operator-controlled show!
Step 6 — Set Up the Operator Control View
Exaplay 3 includes a simplified Control View that shows only the Playlist and transport controls — no editing tools. This is what you share with your show operator.
- Find your machine's IP address (e.g.
192.168.1.100). - On any device on the same network, open a browser and go to:
http://192.168.1.100:8123/control - The operator sees a clean interface with:
- The list of cues (with names and hotkeys)
- Play / Pause / Stop buttons
- Current timecode display

Tablets and phones
The Control View is responsive and works well on tablets. For live events, giving the operator an iPad or Android tablet with this URL creates a portable, wireless show control surface.
Step 7 — Save and Archive
- Press Ctrl+S to save your project.
- The
.vppfile inDocuments\Exaplay3\now stores everything: both screen layouts, all media references, the Playlist, transition settings, and loop configurations.
Keep your media files accessible
Media files are referenced by file path, not embedded in the project. When moving a project to another machine:
- Keep the media folder in the same relative location, or
- Place media in
Documents\Exaplay3\media\on the target machine - Use File → Export Project to create a ZIP archive that includes all referenced media files
✅ Checkpoint — What You've Accomplished
You have built a complete show-ready project:
- [x] Created a two-screen setup (Left and Right projectors)
- [x] Added looping background videos to both screens
- [x] Layered a title graphic on top of the background using Track 2
- [x] Configured crossfade transitions for smooth visual blending
- [x] Created a Playlist with a hotkey-triggered cue
- [x] Tested operator-driven cueing with the F1 key
- [x] Set up the Control View URL for a show operator
- [x] Saved the project as a
.vppfile
Going Further
Now that you have the fundamentals, explore these topics to expand your skills:
| Topic | Link | What you'll learn |
|---|---|---|
| Full Interface Guide | Interface Overview | Every panel, tool, and shortcut in detail |
| Visual Effects | Effects | Color keying, chromatic aberration, dome looks, and other live effect controls |
| Projection Mapping | Projection Mapping | VIOSO warping, edge blending, multi-projector geometry |
| Timecode Sync | Timecode & ArtNet | LTC, ArtNet, and OSC sync for frame-accurate shows |
| User Panel Builder | User Panels | Create custom touch-friendly operator panels |
| Live Events Workflow | Live Events | End-to-end guide for concerts and festival stages |
| Multi-Client Setup | Multi-Client | Synchronise playback across multiple Exaplay 3 instances |
Challenge yourself
Try extending this project by adding:
- A second cue that fades the title out (Go to timecode at the end of the title clip)
- A third layer on Track 3 with a logo watermark set to 50% opacity
- A different background video on each screen