
Appearance
Dome Projection Setup
This guide covers setting up Exaplay 3 for dome projection — full-dome digital planetariums, immersive art domes, inflatable event domes, and simulation domes.
Dome Projection Basics
A dome screen is a hemispherical surface. A standard flat-screen projector cannot illuminate it correctly without a special optical element and geometric correction:
| Approach | How it works | Best for |
|---|---|---|
| Single fisheye projector | One projector with a fisheye lens illuminates the entire dome from below the centre | Small domes (≤ 8 m), inflatable domes, mobile setups |
| Multi-projector ring | 4–6 standard projectors arranged around the dome, edge-blended at the joins | Large permanent domes (> 8 m), planetariums, simulation domes |
Part 1 — Single Fisheye Projector Setup
Hardware requirements
- One projector with a 180° fisheye projection lens
- Projector positioned at the dome's tilt point (below centre, angled up)
- Ensure the projector's lens covers the full dome with a single image
Step 1.1 — Set up the Output
- Open Config → Outputs → + Add Output.
- Set resolution to the projector's native resolution (typically 2048 × 2048 square for dome, or 4096 × 4096 for higher quality).
- Enable the output on the projector's display.
Tip: Most dome content is created in a square aspect ratio (1:1) — the fisheye lens handles the mapping to the dome surface. Use a 2K or 4K square framebuffer for best quality.
Step 1.2 — Load Fisheye Calibration (if using VIOSO)
If your fisheye projector has a VIOSO calibration file:
- Open Config → Outputs → Load Warp File.
- Select the
.vwffile from VIOSO Calibrator. - Toggle Warp Enable on.
If you don't have a VIOSO calibration file, use the Manual Warp Editor to do a rough alignment (see below).
Step 1.3 — Manual Warp Adjustment
- Open Config → Outputs → Edit Warp.
- Use a test pattern (cross-hatch or grid) as the output content.
- Move the control points on the grid to align the projected image with the dome seam.
- Use arrow keys for fine adjustment (0.01 steps) and Shift + arrows for coarse (0.1 steps).
- Switch interpolation to Bicubic for smoother warping on a curved surface.
Part 2 — Multi-Projector Ring Setup
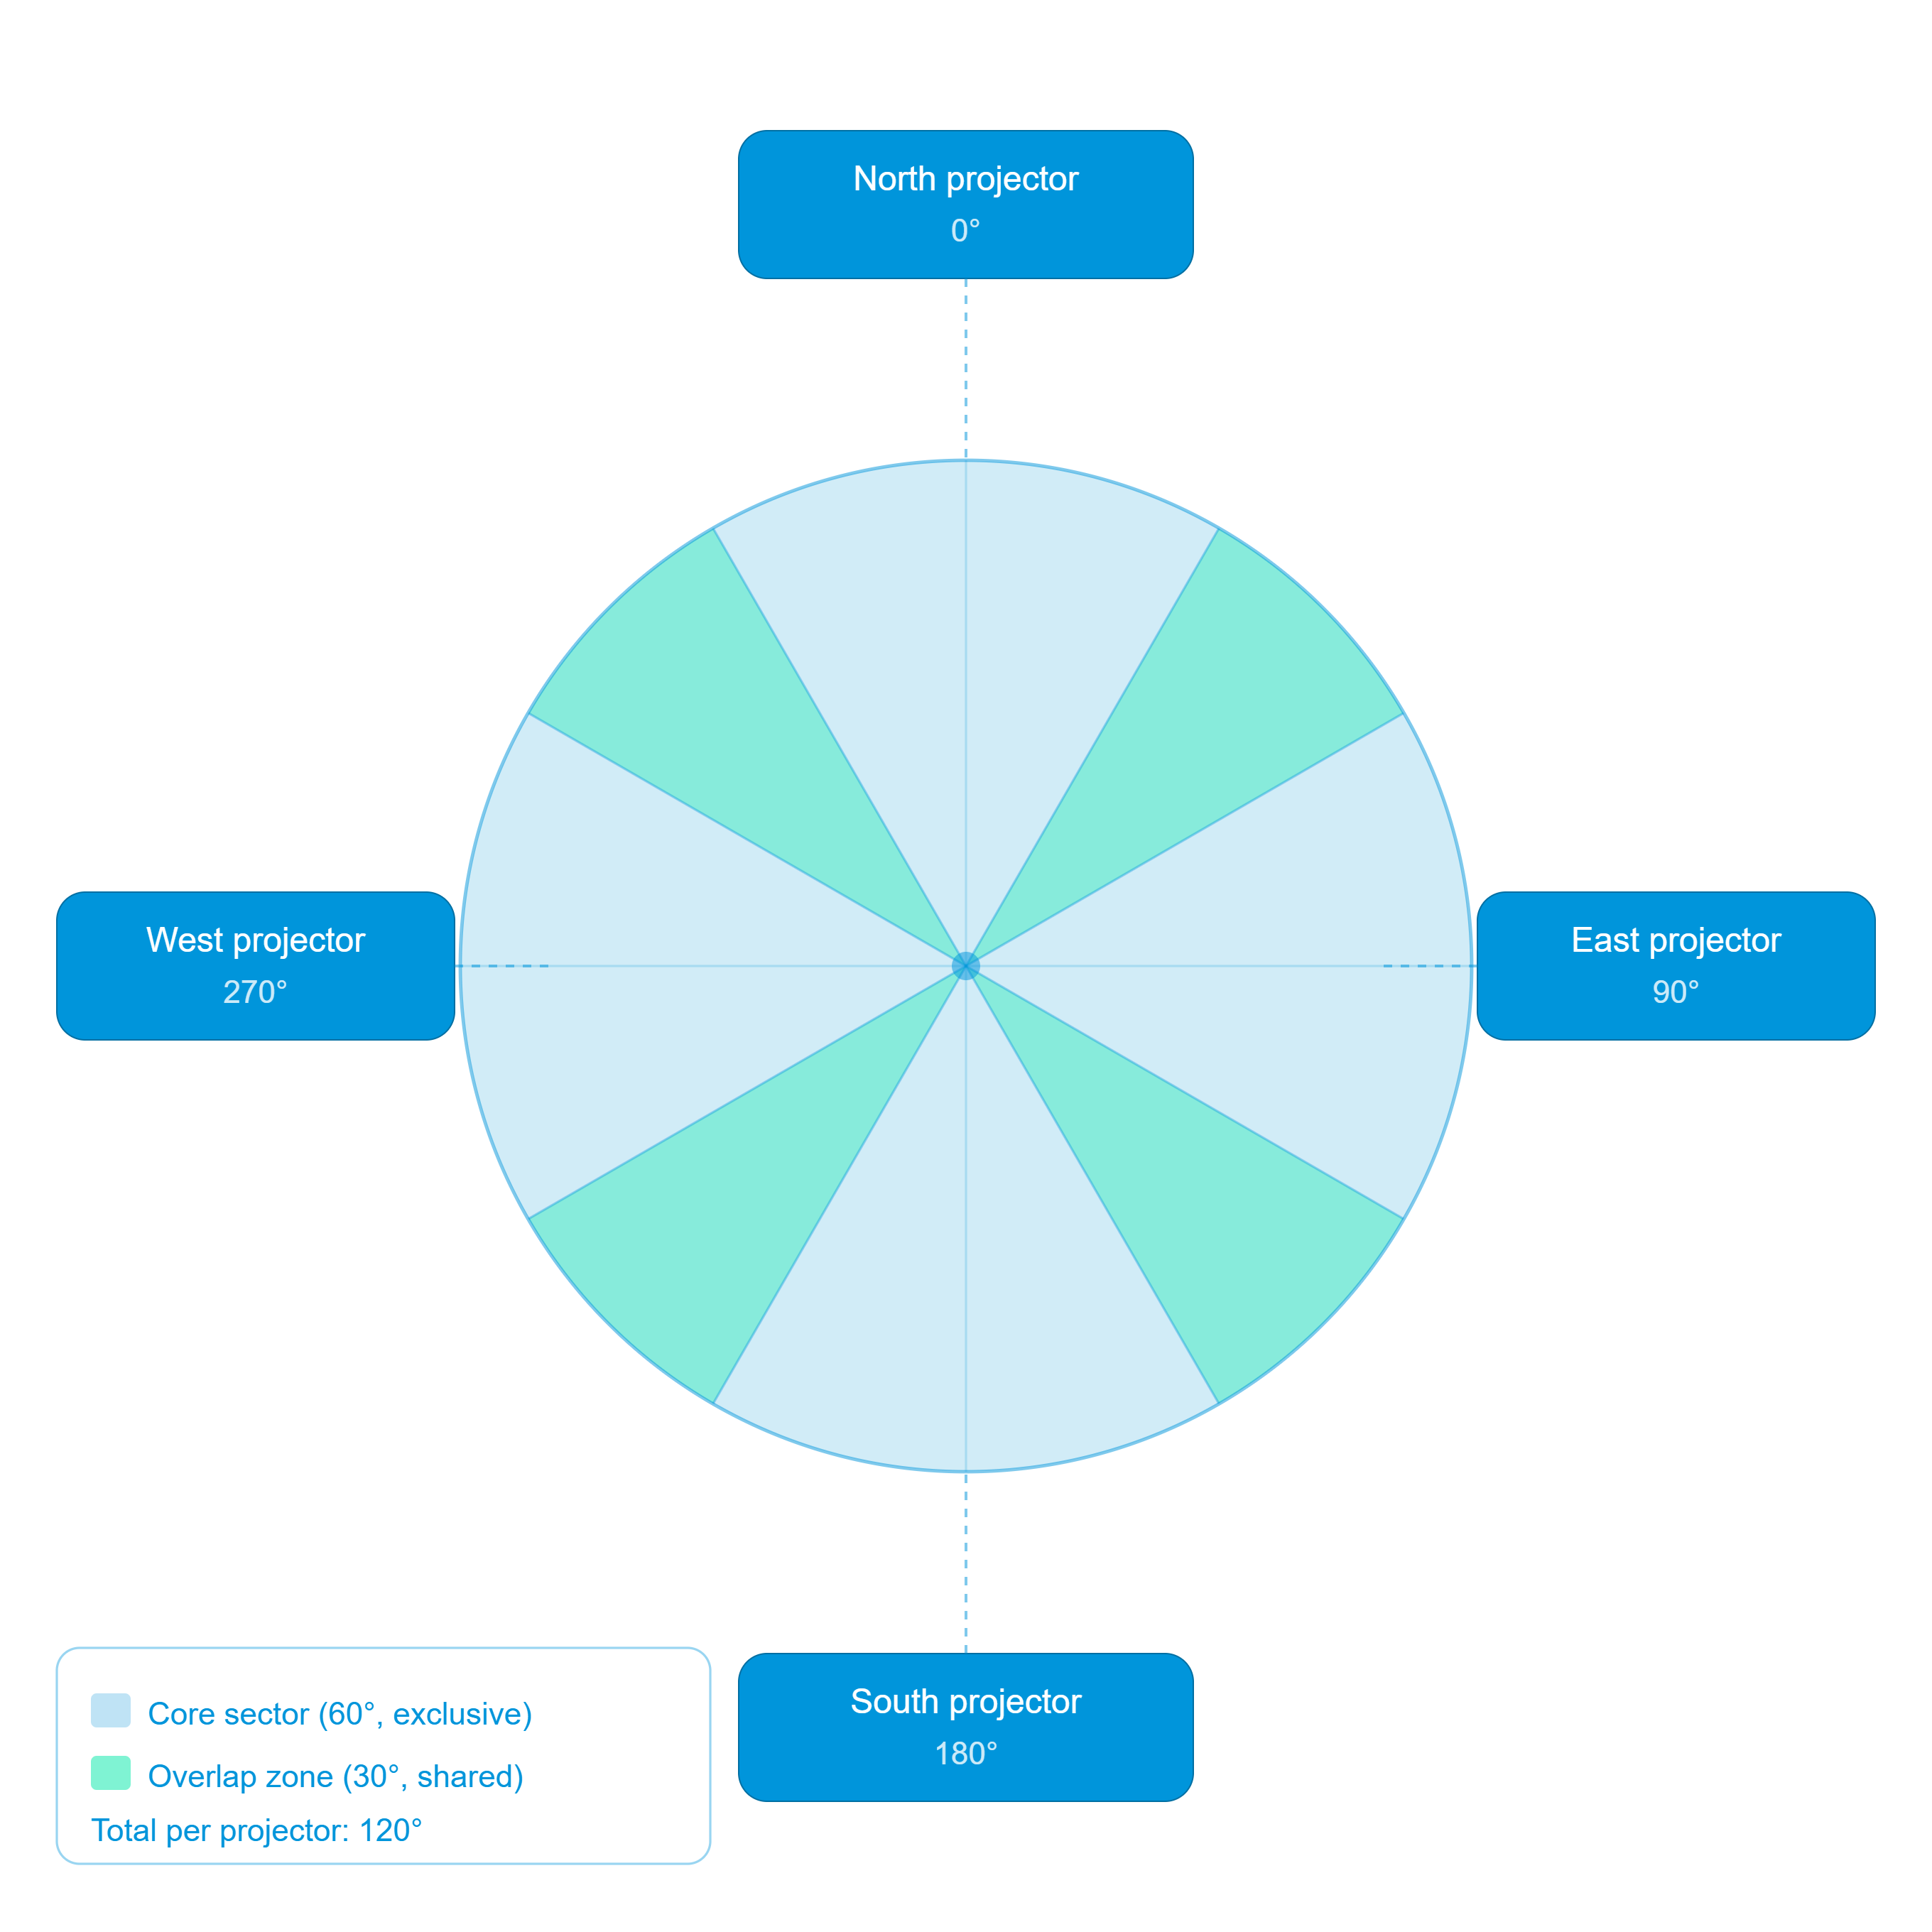
For large domes, a ring of projectors each covers a ~90° sector of the dome, with a 15–25% overlap at the joins.
Hardware Layout Example (4-projector ring)
Step 2.1 — Add One Output per Projector
- Open Config → Outputs.
- Add one output per projector (e.g. Output 1: North, Output 2: East, etc.).
- Set each output's resolution to the projector's native resolution (1920×1080 or 1920×1200 for standard dome projectors).
- Assign each output to a separate display port on the Exaplay PC's GPU.
Step 2.2 — Calibrate with VIOSO AutoAlign
For large permanent domes, VIOSO AutoAlign is the professional choice:
- Connect a calibration camera (e.g. Canon DSLR with a fisheye lens) to the Exaplay machine.
- Go to the Auto Calibration view (
http://<ip>:8123/autocalibration). - Follow the on-screen wizard — VIOSO fires structured-light patterns at each projector in sequence.
- The wizard produces a
.vwffile for each projector automatically. - Load each
.vwfinto its respective output in Config → Outputs.
For full details see Projection Mapping & Warp/Blend.
Step 2.3 — Manual Edge Blend Adjustment
After loading calibration files, fine-tune the edge blend:
- Open Config → Outputs → Edge Blend for the first output.
- Increase Blend Width on the overlapping edge until the join becomes invisible.
- Adjust Gamma Curve — dome surfaces scatter light differently; a lower gamma (e.g. 1.8) often gives a better blend on fabric domes.
- Repeat for all overlapping edges.
Part 3 — Dome Content
Fulldome Format
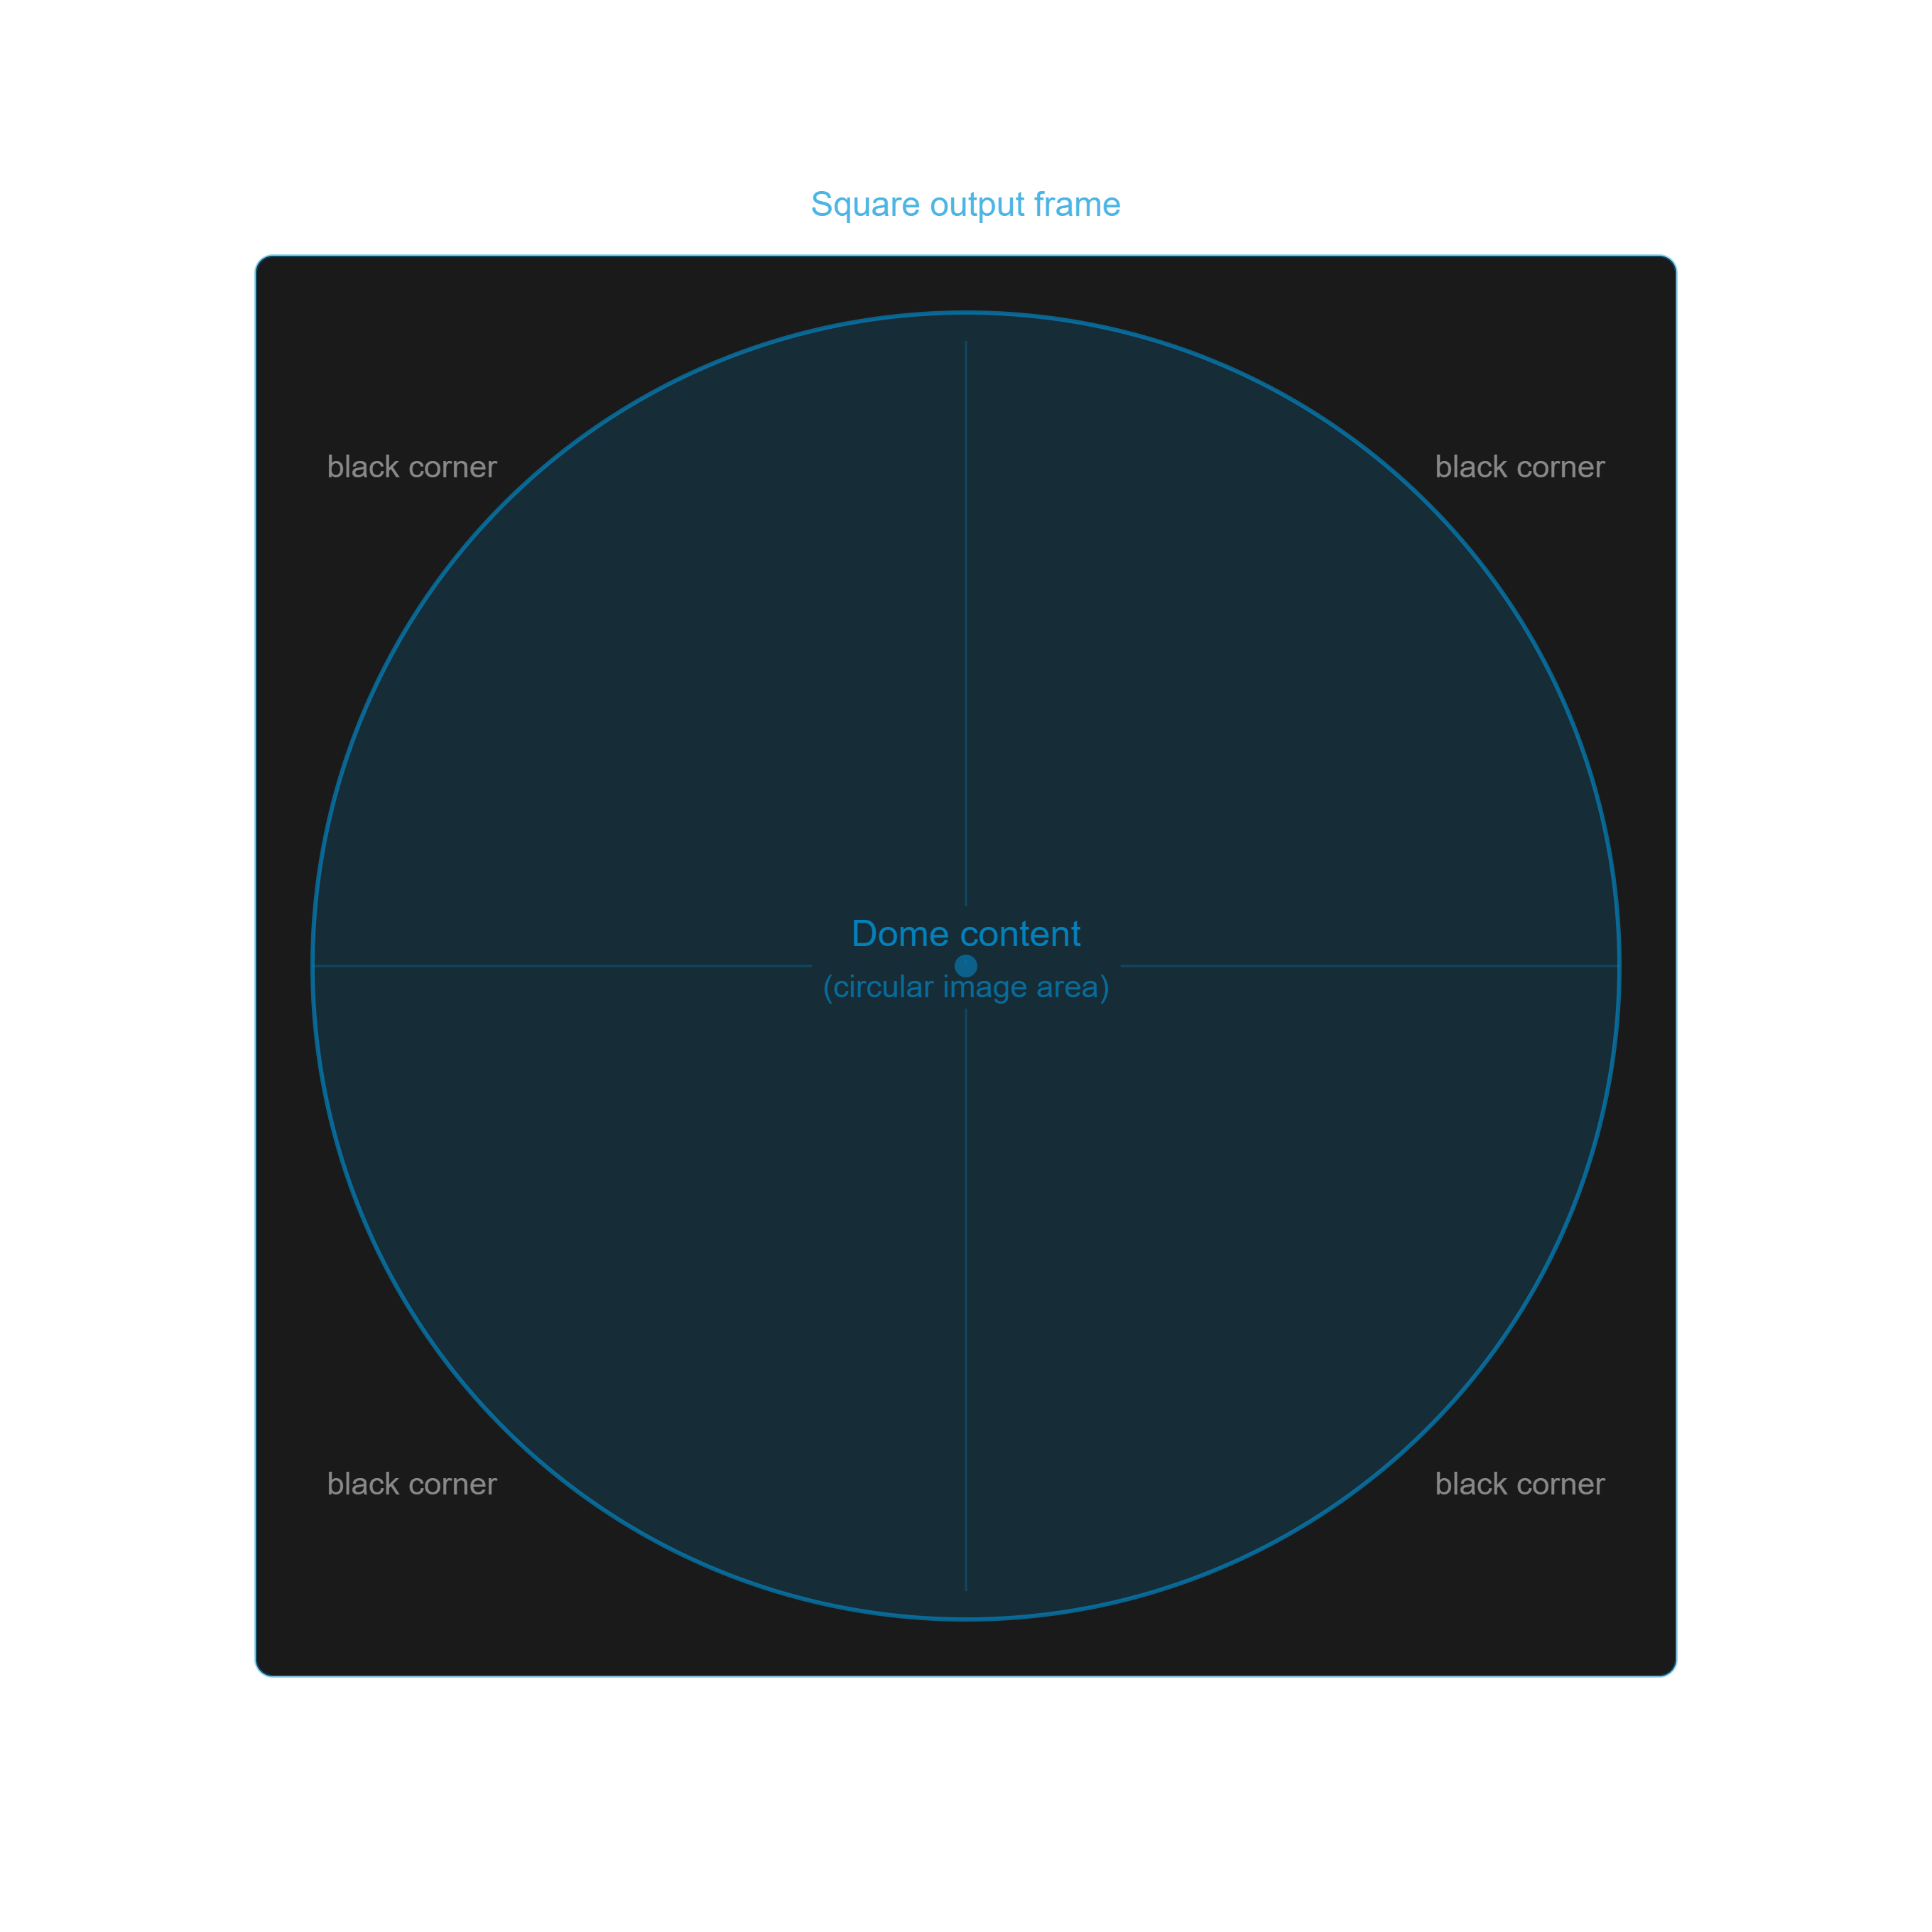
Dome content is typically delivered in fulldome format — a 360° circular image inside a square frame, representing a top-down or angular view of the dome hemisphere:
Standard fulldome resolutions:
- 2K fulldome: 2048 × 2048 px (small domes, real-time)
- 4K fulldome: 4096 × 4096 px (medium/large domes)
- 8K fulldome: 8192 × 8192 px (permanent planetariums — requires high-end GPU)
Codec recommendation: Use HAP Q for 4K fulldome content — it provides GPU-accelerated decode with no CPU bottleneck. At 8K, consider splitting the content across two clips on separate tracks and outputs.
For Multi-Projector Setups
Each projector receives a pre-rendered sector slice of the fulldome image. Ask your content creator to export the dome content as individual slices matching each projector's coverage angle and resolution, or use VIOSO's pixel-mapping to project the full equidistant image across all outputs automatically.
Part 4 — Audio for Dome
Immersive domes typically use ambisonic or multichannel spatial audio to match the 360° visual experience.
- Open Config → Audio Settings.
- Select an ASIO interface with enough output channels (8+ for immersive audio).
- Route each audio channel to the correct speaker position in the dome.
- In the Timeline, use separate audio tracks per speaker group (front, left, right, rear, top).
See Audio for ASIO routing details.
Part 5 — Show Operation
Cue-Based Shows (Planetarium Programs)
- Build the programme as a composition with the full show timeline.
- Create cues at each programme segment for the presenter to advance the show manually.
- Use the Operator Control View (
/control) on a presenter tablet.
Continuous Loop (Art Installation)
- Set the composition to Loop: ∞ Infinite.
- Configure the Scheduler to start the loop when the venue opens and fade to black when it closes.
- Enable Auto-Heal for unattended operation between shows.
Live Presenter Mode
For a live presenter performing under the dome (narrator, musician):
- Set up NDI or a capture card as a live input if you want to feed camera footage of the presenter into the dome content.
- Create a dedicated PRESENTER track in the composition — drag the NDI source onto it.
- In the Playlist, add a cue that enables the presenter track and another that hides it.
Part 6 — Performance Considerations
| Factor | Recommendation |
|---|---|
| GPU | NVIDIA RTX 3080 / 4080 or better for 4K fulldome; 4090 for 8K |
| CPU | 8+ cores; HAP decoding is GPU-bound but CPU handles decompression metadata |
| RAM | 32 GB minimum; 64 GB for multi-projector 8K setups |
| Storage | NVMe SSD for content drives; > 2 GB/s read speed for 4K HAP Q |
| Network | Gigabit Ethernet if using NDI live inputs inside the dome |
| Cooling | Good airflow is essential — GPU and CPU run at near 100% during dome playback |
Use the Diagnostics Panel in the Control View to monitor GPU, CPU, RAM, and VRAM usage during the show.
Summary Checklist
Single-projector fisheye:
- [ ] Square output resolution configured (2K or 4K)
- [ ] Fisheye warp calibration loaded or manual warp adjusted
- [ ] Fulldome content format confirmed (circular image in square frame)
Multi-projector ring:
- [ ] One output per projector, each assigned to correct display
- [ ] VIOSO AutoAlign calibration run and .vwf files loaded
- [ ] Edge blend width and gamma tuned per overlapping edge
- [ ] Content delivered as sector slices (or VIOSO pixel-mapped)
Both setups:
- [ ] HAP or HAP Q codec used for all dome content
- [ ] ASIO multichannel audio routing configured
- [ ] Playlist built for show navigation
- [ ] Diagnostics Panel checked during full-load test
- [ ] Auto-Heal enabled (for unattended dome loops)