
Appearance
Quick Start Tutorial
In this hands-on tutorial you will launch Exaplay 3, create a screen, load a video, and play it back on a connected display. By the end, you will have a saved project file and a clear understanding of the basic workflow.
Time required: about 10 minutes
What You'll Build
A single-screen project that plays a video file on a connected display. Simple, but it covers every core step you will use in every future project.
Before You Begin
Make sure you have:
- [x] Exaplay 3 installed and licensed — see Installation
- [x] At least one display output connected (your primary monitor works fine for learning)
- [x] A video file to play (MP4, MOV, HAP, or any other supported format)
Don't have a test video?
Any MP4 file will work — a phone video, a free stock clip, or a screen recording. For best results, use a file with at least 1920×1080 resolution.
Step 1 — Launch the Application
Start Exaplay 3 from the Desktop shortcut. The web-based editor opens automatically in a WebView2 window. You should see an empty workspace that looks like this:
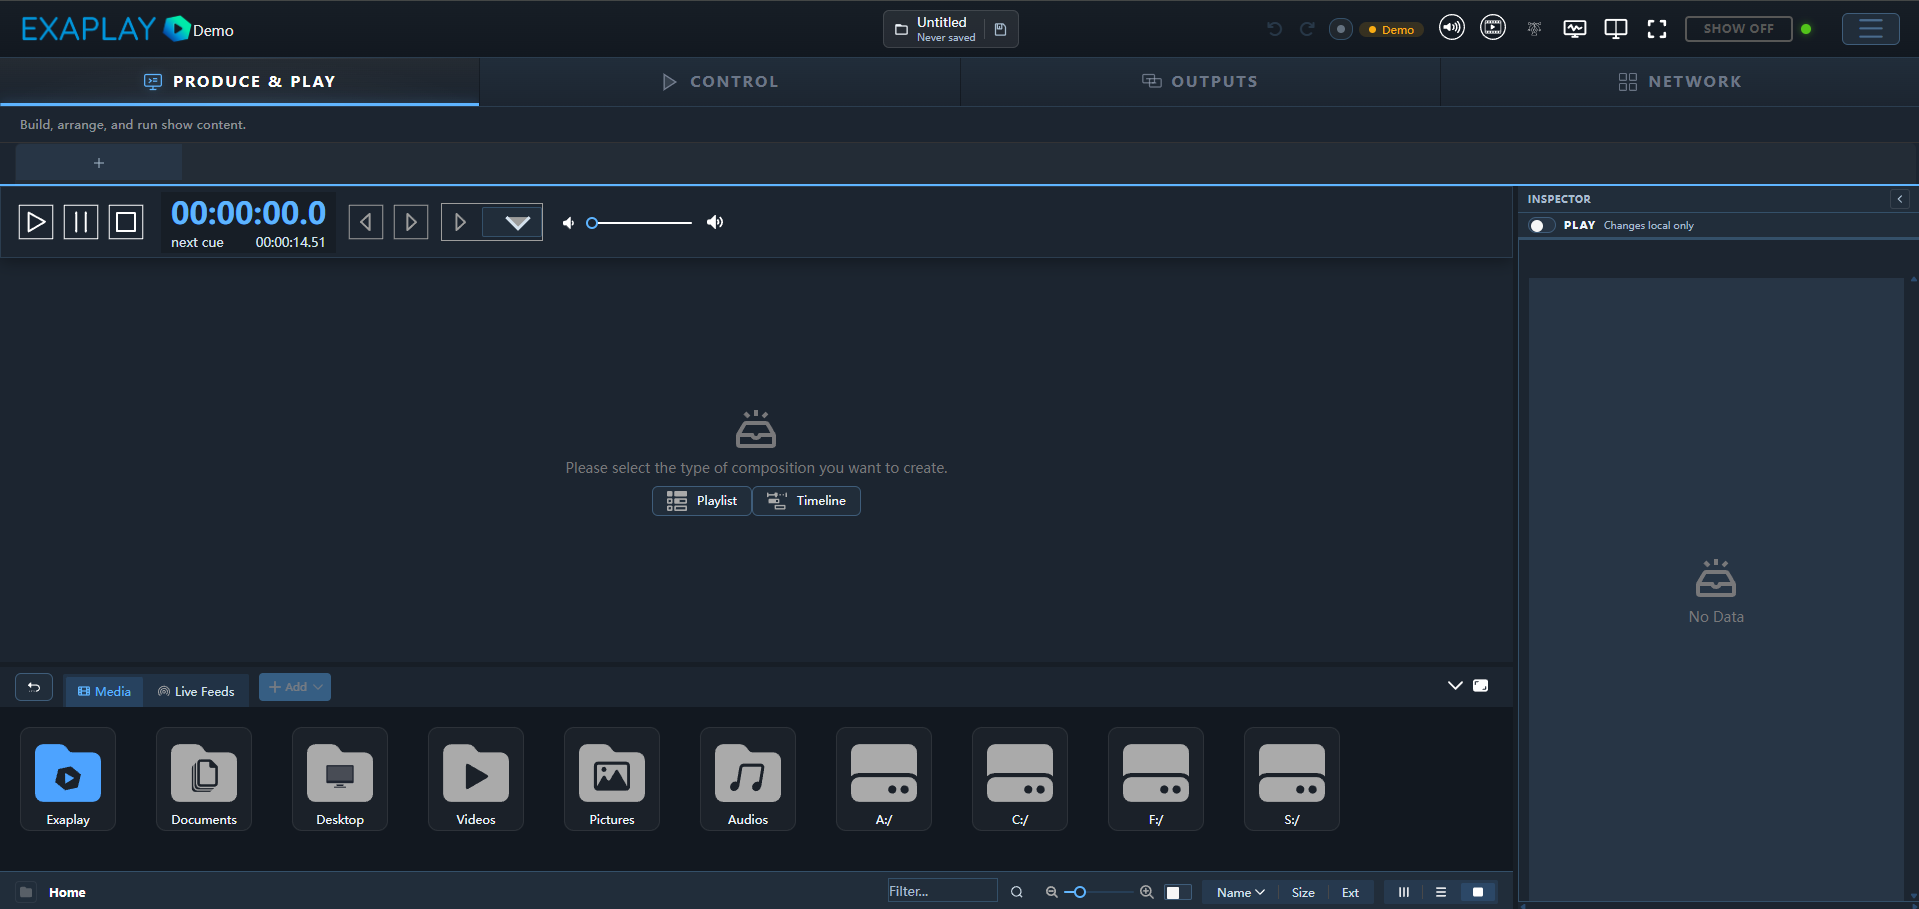
Take a moment to orient yourself. The interface has these main areas:
| Area | Location | Purpose |
|---|---|---|
| Header Bar | Top | Project name, screen tabs, show-mode toggle |
| Canvas | Centre | Visual preview of the selected screen |
| Inspector | Right side | Properties panel for the selected item |
| Timeline / Playlist | Centre | Arrange media clips in time or as a list of cues |
| Media & Live (File Browser) | Bottom | Media thumbnails, live feeds, targets, visualizer |
| Transport | Top bar | Play, pause, stop, and timeline position |
First-time blank slate
On first launch the canvas is empty because no screens exist yet. That is normal — you will create one in the next step.
If the Setup Wizard opens first
You can use it to create a starter project, or close it and continue with this hands-on tutorial. Either approach works.
Step 2 — Create a Screen
A Screen in Exaplay 3 represents a physical display output. You need at least one screen to display content.
- In the top toolbar, click + Screen.
- A dialog appears asking for:
- Name — Give it a descriptive name, e.g.
Main ScreenorProjector 1. - Output — Choose your connected display from the drop-down list. If you only have one monitor, choose it — the output will be overlaid on your desktop during preview and go fullscreen in Show Mode.
- Resolution — This is auto-detected from your display's EDID data. You usually don't need to change it.
- Name — Give it a descriptive name, e.g.
- Click Create.
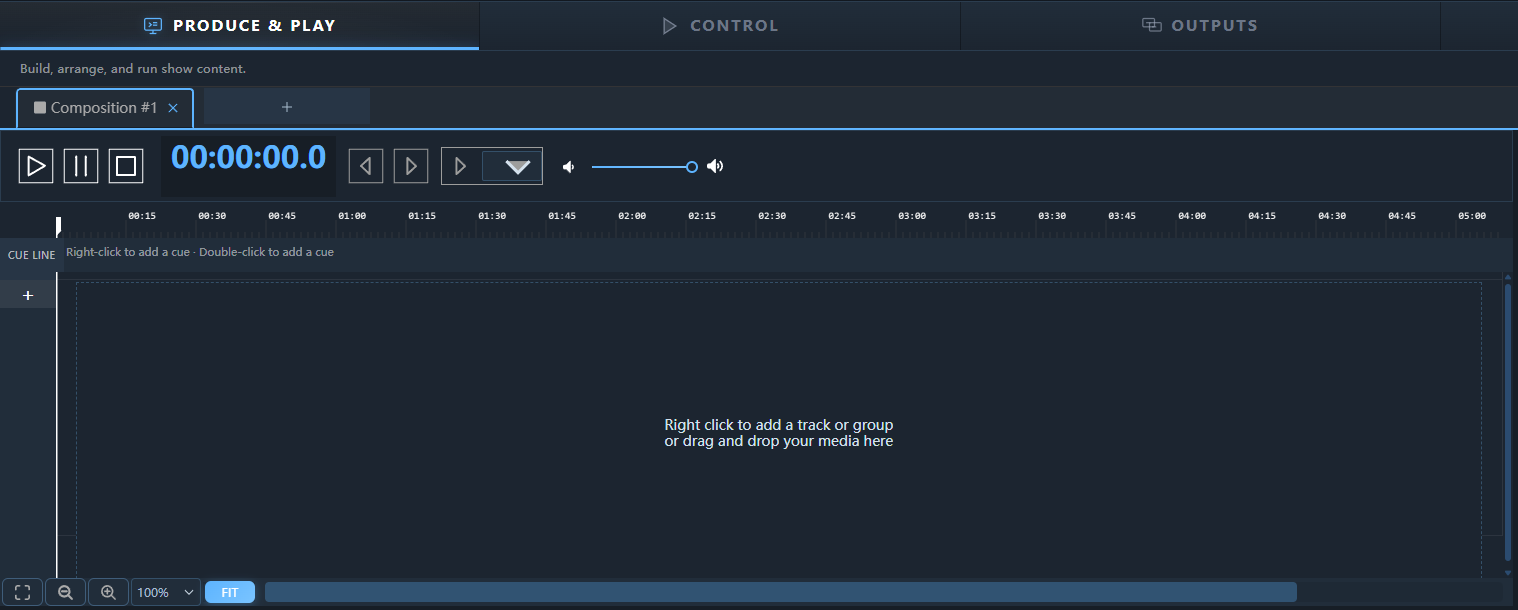
A new composition canvas appears in the editor. The screen name shows up as a tab in the header bar — you can have multiple screens and switch between them using these tabs.
What just happened behind the scenes?
Creating a screen did three things:
- Registered a display output in the engine
- Created a Composition — the visual scene that will be rendered to that output
- Added an empty Timeline with tracks ready for media clips
Step 3 — Browse for Media
Now you need to find a video file to play.
- Look at the Media & Live panel at the bottom of the editor (the File Browser).
- Click the folder icon (📁) to open a directory picker.
- Navigate to the folder containing your video file and select it.
- The browser now displays thumbnails for all supported media files in that folder.
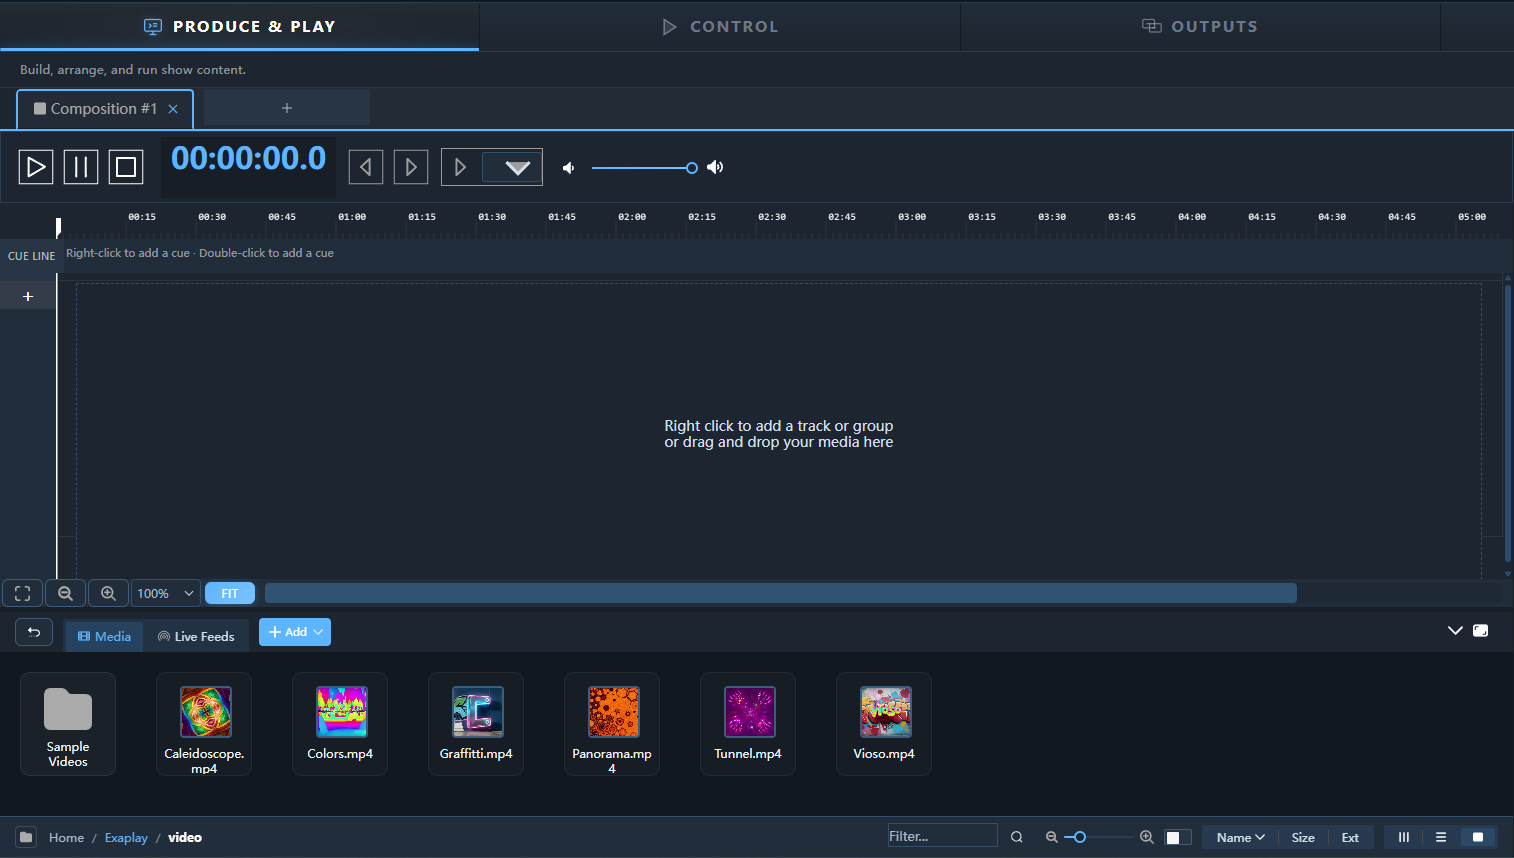
You should see your video file appear as a thumbnail. Hover over it to see its filename, resolution, duration, and codec.
Organise your media early
A good practice is to keep all media for a project in a single folder (or sub-folders within it), and place that folder inside Documents\Exaplay3\media\. This makes projects portable and avoids missing-file warnings.
Step 4 — Add the Video to the Timeline
With your video visible in the File Browser, it is time to add it to the composition:
- Click and drag the video thumbnail from the File Browser.
- Drop it onto Track 1 in the Timeline panel.
- The clip appears as a coloured block on the track, showing its duration.
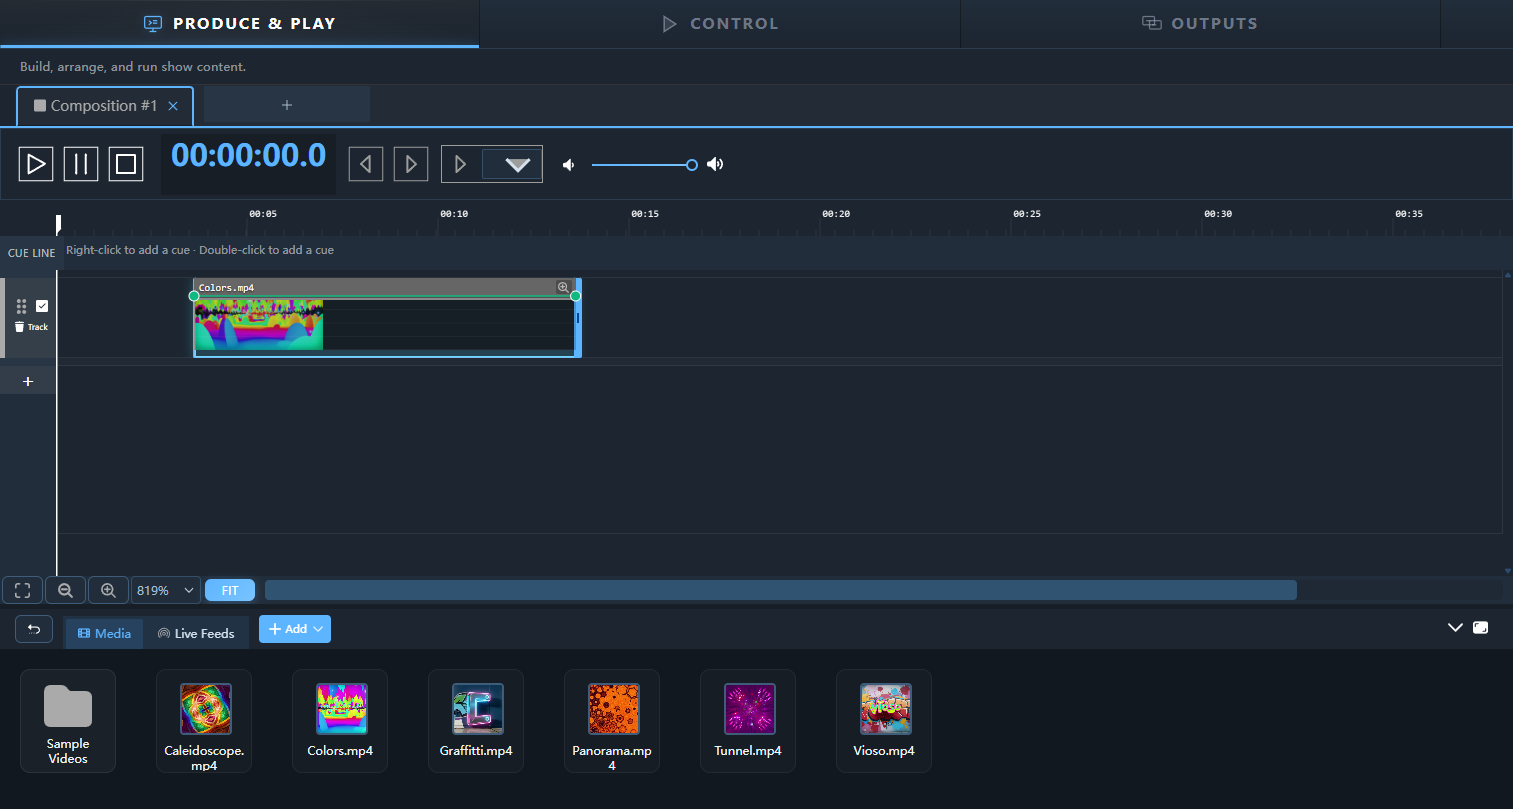
The canvas now shows the first frame of your video. You have just added a media clip to Layer 1 of your composition.
What is a Track?
Each track in the timeline corresponds to a layer in the composition. Track 1 is the bottom layer, Track 2 sits on top, and so on. Layers higher in the stack draw over lower layers, which is how you composite titles, graphics, and effects on top of background video.
Position clips visually with the Layout Designer
Once a clip is on the timeline, open the Output Preview (🖥 in the header) and click Layout Designer to drag, resize, and rotate items directly on top of the live output. Full reference: Layout Designer.
Step 5 — Play the Video
Now for the satisfying part — seeing your video play:
- Press Space on your keyboard, or click the ▶ Play button in the Transport bar at the bottom.
- The playhead moves across the timeline and the video plays on the canvas preview.
- If you have Show Mode active (or toggle it with Shift+Escape), the video also appears fullscreen on the assigned display output.
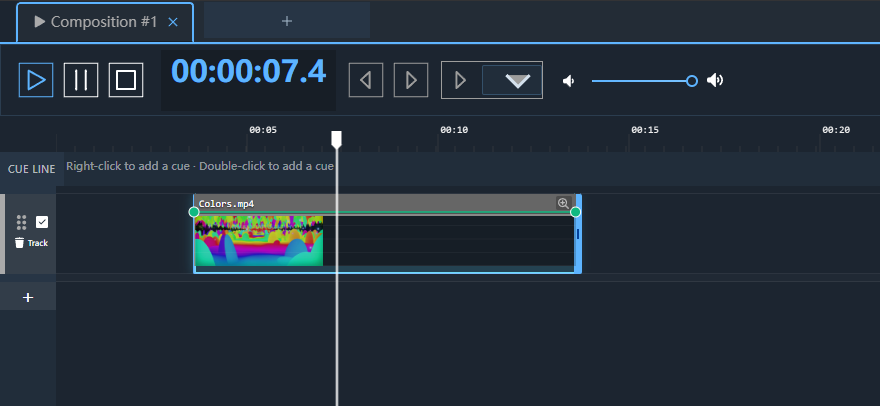
Playback controls to know:
| Action | Keyboard | Mouse |
|---|---|---|
| Play / Pause | Space | Click ▶ / ⏸ in the Transport |
| Stop (return to start) | Escape | Click ⏹ in the Transport |
| Scrub through timeline | — | Click or drag the playhead |
Press Space again to pause, and Escape to stop and return to the beginning.
Step 6 — Save Your Project
Save your work so you can pick up where you left off:
- Press Ctrl+S or choose File → Save.
- Enter a project name — e.g.
My First Project. - The project is saved as a
.vppfile inDocuments\Exaplay3\.
Media files are referenced, not embedded
The .vpp file stores references to your media files by their file path. If you move the media files to a different folder, Exaplay 3 will show missing-file warnings. Keep your media in a stable location.
✅ Checkpoint — What You've Accomplished
Congratulations! You have completed the essential Exaplay 3 workflow:
- [x] Launched the application and oriented yourself in the interface
- [x] Created a Screen mapped to a display output
- [x] Browsed for media in the File Browser
- [x] Added a video clip to the Timeline
- [x] Played the video back with the Transport controls
- [x] Saved the project as a
.vppfile
This is the foundation of every Exaplay 3 project. From here, everything builds on these same concepts — more screens, more layers, effects, Playlists, and operator controls.
What's Next?
You are ready for a more involved project. Continue to Your First Project where you will:
- Set up two screens for a dual-projector setup
- Use multiple layers for background loops and title graphics
- Create Playlists for operator-driven control
- Share a Control View URL for your show operator
Other Useful Links
- Key Concepts — Review the terminology if anything was unclear
- Interface Overview — Deep dive into every panel and tool
- Output Setup — Configure multi-monitor and multi-projector rigs
- Media Playback — Supported codecs, performance tuning, looping options