
Appearance
Museum Installation with User Panels
This guide covers a complete museum exhibit installation: unattended playback during visitor hours, staff-operated touchscreen kiosks that visitors interact with, and an easy-to-use maintenance panel for museum staff — all built without custom software.
What We Are Building
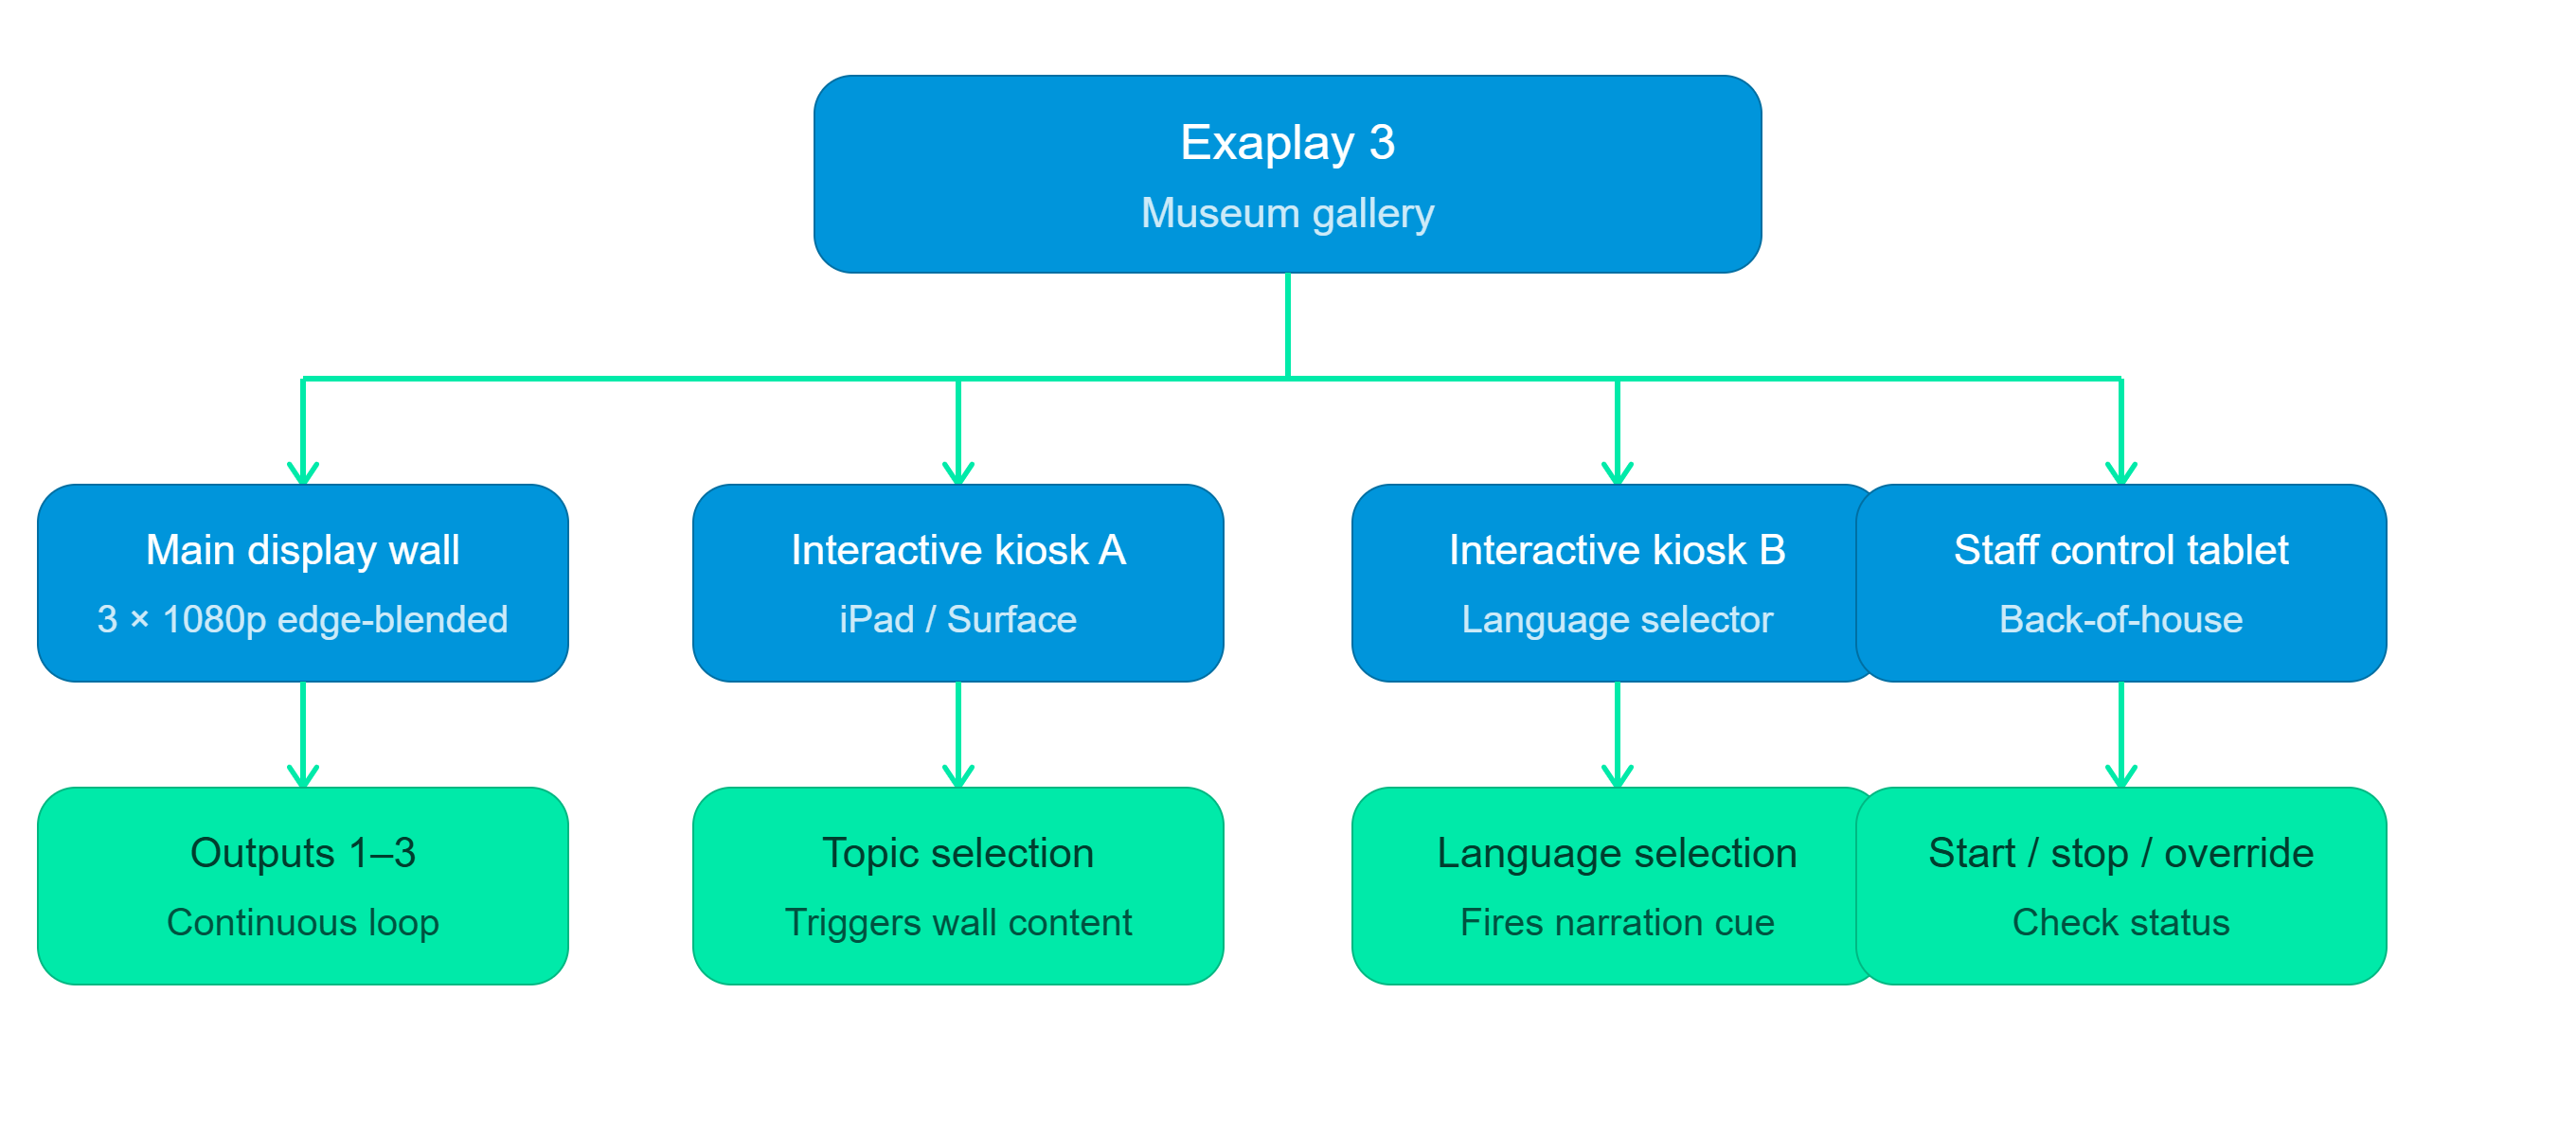
Everything is served from one Exaplay 3 instance. Staff and visitors access different User Panel views from their tablets — no app installation required.
Part 1 — Content and Compositions
Step 1.1 — Plan your content structure
A typical museum exhibit has:
| Composition | Purpose |
|---|---|
Idle_Loop | Ambient background when no visitor is interacting (attract loop) |
Topic_A | Full-screen content for Topic A (e.g. "Ancient Egypt") |
Topic_B | Full-screen content for Topic B |
Topic_C | Full-screen content for Topic C |
Transition_Out | Short fade-to-idle transition |
Each topic composition contains:
- Track 1 — background video (looping)
- Track 2 — narration audio (one per language variant, use cues to switch)
- Track 3 — overlay graphics (title, caption text)
Step 1.2 — Set up Outputs
- Open Config → Outputs.
- Add outputs for each projector (e.g. Output 1:
Display 2, Output 2:Display 3, Output 3:Display 4). - If projectors overlap, load VIOSO calibration files for edge blending. See Projection Mapping.
- Assign all outputs to the same composition canvas if content should span the full wall.
Step 1.3 — Build the Playlist
Create cues for every visitor-triggerable action:
| Cue | Action |
|---|---|
Go Idle | Play Idle_Loop composition |
Topic A | Play Topic_A composition |
Topic B | Play Topic_B composition |
Topic C | Play Topic_C composition |
Language EN | Switch to English narration track |
Language FR | Switch to French narration track |
Language DE | Switch to German narration track |
In the Playlist editor, create each cue and configure its action. Label cues clearly — these names will appear on the User Panels.
Part 2 — Building User Panels
Step 2.1 — Open User Panel Builder
- Navigate to the Control View (
/control). - Click the 🎨 User Panels tab.
Step 2.2 — Create the Visitor Kiosk Panel (Kiosk A)
- Click + Create Panel.
- Set:
- Title:
Topics - Colour:
#1a73e8(blue) - Description:
Explore the exhibition
- Title:
- Click OK.
Add cue buttons:
- Go to the ▶️ Playback tab.
- Hover over Topic A → click + → choose
Topicspanel. - Repeat for Topic B, Topic C, and Go Idle.
The visitor panel now has four large tappable buttons.
Step 2.3 — Create the Language Panel (Kiosk B)
- Click + Create Panel.
- Set:
- Title:
Language - Colour:
#34a853(green)
- Title:
- Add cue buttons: Language EN, Language FR, Language DE.
Step 2.4 — Create the Staff Control Panel
- Click + Create Panel.
- Set:
- Title:
Staff Control - Colour:
#ea4335(red) - Description:
Museum staff only
- Title:
- Add cue buttons: Go Idle, and all topic cues.
- Go to the Custom Control tab. Pin the Master Brightness fader from the Inspector and add it to the
Staff Controlpanel (useful for dimming during events or talks).
See Custom Controls for how to pin parameters.
Part 3 — Deploying to Kiosk Tablets
Visitor Kiosk A (Topics)
Open this URL in the browser on the kiosk tablet:
http://<exaplay-ip>:8123/topics_panel.htmThis URL opens the Topics panel directly. The slug topics is auto-generated from the panel title Topics.
Put the browser in full-screen / kiosk mode (Chrome --kiosk flag, or an iPad kiosk app) to prevent visitors from navigating away.
Visitor Kiosk B (Language)
http://<exaplay-ip>:8123/language_panel.htmStaff Tablet
http://<exaplay-ip>:8123/staff-control_panel.htmOr give staff the full Control View URL for advanced control:
http://<exaplay-ip>:8123/controlPart 4 — Unattended Operation (Visitor Hours)
Scheduler Setup
Configure Exaplay to start and stop the exhibit automatically:
- Open the 📅 Schedule tab in the Control View.
- Add events:
| Time | Days | Action |
|---|---|---|
09:00 | Mon–Sun | Play composition: Idle_Loop |
18:00 | Mon–Sun | Fade to black |
03:00 | Daily | Stop (nightly maintenance window) |
Auto-Heal
Enable Auto-Heal so that any crash is recovered without staff intervention:
- Open Settings → Auto-Heal → Enable.
- Set Save Interval to
2 s. - Set Watchdog Restart to ON with a 5 s delay.
The exhibit will resume the idle loop automatically after any crash.
Windows Auto-Start
exaplay3.exe -f "C:\Museum\exhibit.vpp" -playcomp -autoheal-restoreAdd to Task Scheduler on logon with a 30-second delay (to allow displays to connect).
See Permanent Installations for the full Windows configuration checklist.
Part 5 — Returning to Idle (Auto-Reset)
Museums often want interactive content to return to the idle loop if no visitor interacts for a period of time (e.g. 2 minutes).
Use the Scheduler to fire the Go Idle cue at regular intervals as a fallback:
- Add a Schedule event:
Every 2 minutes (recurring)→Fire cue: Go Idle.
Or implement a Data Track with a countdown timer that fires the cue via OSC if no input is received. See Data Tracks.
Part 6 — Remote Monitoring
Staff can monitor the exhibit remotely (from the museum office or from home) without physically visiting the gallery:
- Open the 📡 Monitor tab in the Control View.
- The Event Log shows every visitor cue trigger, providing a usage log.
- The Diagnostics Panel (FPS, RAM, VRAM) shows if the system is under stress.
If the exhibit is accessible over the museum's network from outside the gallery, save the Control View URL on the museum's intranet.
Summary Checklist
- [ ] Compositions created: Idle_Loop + one per topic
- [ ] Playlist populated with all visitor-triggerable and language cues
- [ ] User Panels created: Topics, Language, Staff Control
- [ ] Cue buttons added to correct panels
- [ ] Kiosk tablet URLs configured with
_panel.htmpretty URLs (e.g./topics_panel.htm) - [ ] Browsers in kiosk/full-screen mode
- [ ] Scheduler configured for opening/closing times
- [ ] Auto-Heal and Watchdog enabled
- [ ] Windows startup task configured
- [ ] Remote monitoring URL saved for staff