
Appearance
Installation
This guide walks you through downloading, installing, and activating Exaplay 3 on a Windows PC. By the end, you will have the application running and ready for the Quick Start Tutorial.
What You'll Need
- A Windows 10 or 11 PC (64-bit) — see System Requirements for full specs
- Administrator access to install software
- An internet connection (for downloading and license activation)
- Your Exaplay 3 license key (provided by your reseller or via email)
Step 1 — Download the Installer
Download the latest Exaplay3_Setup.exe from the official release page.
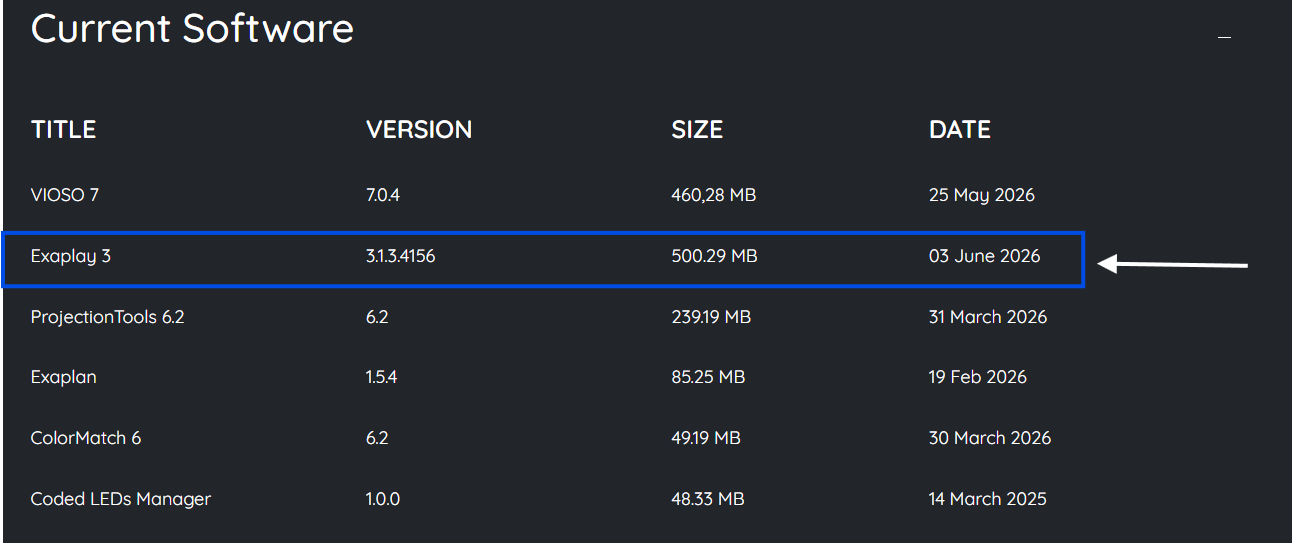
The installer is a single executable file, approximately 150 MB. No separate downloads are needed — all prerequisites are bundled.
Step 2 — Run the Installer
- Double-click
Exaplay3_Setup.exe. - Windows may show a User Account Control (UAC) prompt — click Yes to allow the installation.
- Follow the on-screen wizard. The default installation path is
C:\Program Files\Exaplay3\.
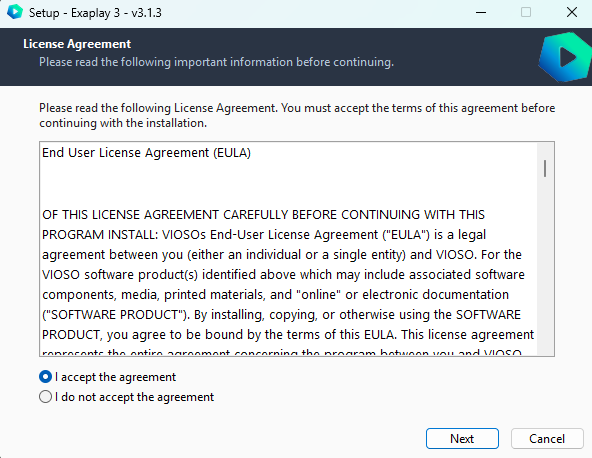
The installer automatically handles these prerequisites:
| Prerequisite | Purpose |
|---|---|
| Microsoft runtime components | Required Windows components for Exaplay 3 |
| Microsoft WebView2 Runtime | Hosts the web-based editor UI |
Both are installed silently if not already present on your system.
What gets installed?
- Application files →
C:\Program Files\Exaplay3\ .vppfile association → Double-clicking a.vppproject file opens it in Exaplay 3- Start Menu and Desktop shortcuts
- Watchdog system service (monitors the engine for crash recovery)
Step 3 — Launch Exaplay 3
Start the application from the Desktop shortcut or the Start Menu.
On first launch, Exaplay 3 will:
- Create a working directory at
Documents\Exaplay3\(in your Windows Documents folder) — this is where projects, media references, and auto-heal data are stored. - Start the background Watchdog service that monitors the engine and can automatically resume playback after a crash.
- Open the web-based editor in a WebView2 window.
You will see the Exaplay 3 icon  in the Windows system tray. Right-click it for quick access to the UI, show mode, and other options.
First-Run Welcome Screen and Setup Wizard
On a fresh installation, Exaplay 3 can open with a Welcome Screen and Setup Wizard to help you create a starter project more quickly.
The Setup Wizard walks through:
- Use Case — choose a starting point such as live show, installation, concert, or corporate event
- Output — select the display you plan to use first
- Audio — choose the audio device for the project
- Project Settings — set the project name, composition name, and frame rate
When you finish, Exaplay creates a starter project so you can begin working immediately.
Skip it if you prefer to build manually
You can close the wizard at any time and create screens, outputs, and timelines yourself. You can also reopen the welcome screen later from Settings → Interface → Show Welcome Screen.
Step 4 — Activate Your License
Exaplay 3 uses the Soraco QLM licensing system.
- On first launch, an activation dialog appears.
- Enter your license key in the field provided.
- Click Activate.
Activation requires an internet connection. For offline environments, contact your reseller for a response file that can be imported manually.
Verify activation
After activation, check Settings → About in the web UI to confirm your license status and edition.
Step 5 — Verify the Installation
Before moving on, confirm everything is working:
- [ ] The Exaplay 3 icon appears in the system tray
- [ ] The web UI opens and shows an empty project
- [ ] The tray icon right-click menu is accessible
- [ ] Settings → About shows your license is active
If any of these checks fail, see Troubleshooting → Crashes & Recovery for common first-launch issues.
Uninstalling
Use Windows Settings → Apps → Exaplay 3 → Uninstall, or run Uninstall.exe from the installation folder.
WARNING
The working directory (Documents\Exaplay3\) is preserved during uninstall so you don't lose projects. Delete it manually if you want a completely clean removal.
Advanced: Command-Line Flags
When launching the executable from a command prompt or shortcut, you can pass optional flags to customise startup behaviour:
| Flag | Description |
|---|---|
-log | Enable detailed logging to a file (useful for debugging) |
-fresh | Start with a clean state, ignoring any auto-heal data |
-w [ms] | Add a startup delay in milliseconds (useful for waiting for display initialisation) |
-f [path] | Load a specific .vpp project file on startup |
-playcomp | Automatically play the first composition after loading |
-playcue | Automatically play the first Playlist after loading |
-playvideo [path] | Directly play a video file without requiring a project file |
-ui | Open the web UI automatically on start |
-autoheal-restore | Restore playback state from auto-heal data (used by Watchdog) |
Example: Kiosk Shortcut for a Specific Video
You can create a Windows desktop shortcut that opens Exaplay 3 and immediately plays a video — no project file needed. This is ideal for kiosk setups and visitor stations.
- Right-click the Desktop → New → Shortcut.
- In the Location field, enter:
"C:\Program Files\Exaplay3\exaplay3.exe" -playvideo "C:\Videos\welcome.mp4" - Click Next, name it (e.g. "Play Welcome Video"), and click Finish.
You can combine flags — for example, add -ui to also open the editor:
"C:\Program Files\Exaplay3\exaplay3.exe" -playvideo "C:\Videos\welcome.mp4" -uiTIP
Enclose file paths that contain spaces in double quotes. If the video file is not found, Exaplay 3 starts normally with an empty project.
What's Next?
Your installation is ready! Continue to Key Concepts to learn the terminology, then follow the Quick Start Tutorial to play your first video.